Installation via the UI
If you prefer the interactive setup, start the installer normally and follow the on-screen steps. This is usually the simplest option when an administrator is working directly on the target system.
Quick installation checklists
Standard installation checklist
Use this path if the installer should create the required user automatically.
- Confirm that the target server has administrator access, DATEV Platform, DATEVconnect, access to
L:\, and network access toapi.klardaten.comandnats.klardaten.comon port443. - Run the installer with administrator privileges on the target system.
- Keep the default installation path unless your environment requires a different folder.
- Let the installer create the Windows user
klardatenand the linked DATEV user. - Enter proxy values only if they are required and were not detected automatically.
- Finish the setup and then complete the post-installation checks from the Troubleshooting chapter.
Existing user checklist
Use this path if the Windows user and DATEV user already exist.
- Confirm that the target server has administrator access, DATEV Platform, DATEVconnect, access to
L:\, and network access toapi.klardaten.comandnats.klardaten.comon port443. - Prepare the Windows user in advance and link it to the correct DATEV user in DATEV Arbeitsplatz.
- Make sure the user can access the DATEV configuration and ConfigDB, can log on locally and as a batch job, and has the required DATEV rights.
- Start DATEV Arbeitsplatz at least once with that user before installing the connector.
- Run the installer with administrator privileges and choose the existing user instead of creating a new one.
- Finish the setup and then complete the post-installation checks from the Troubleshooting chapter.
UI Installation Screenshots
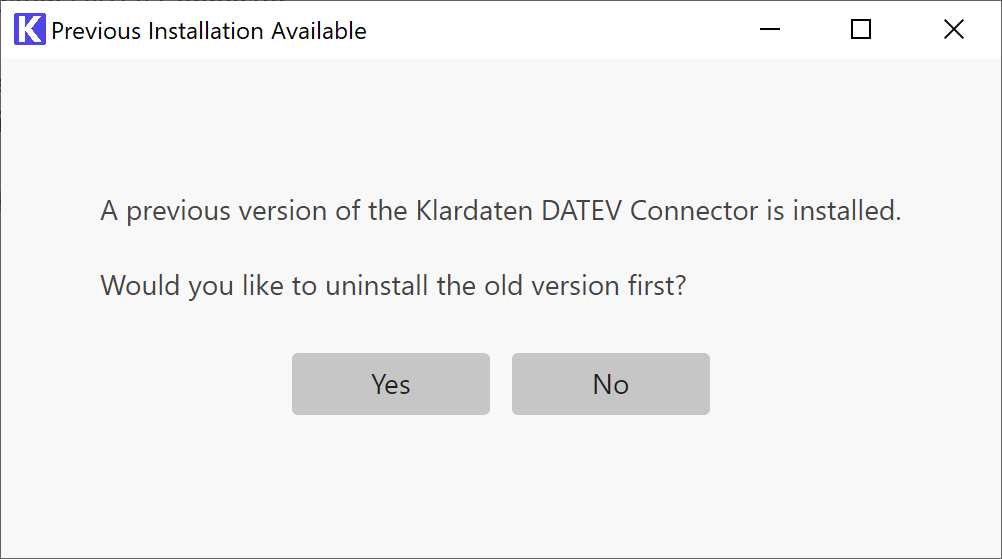
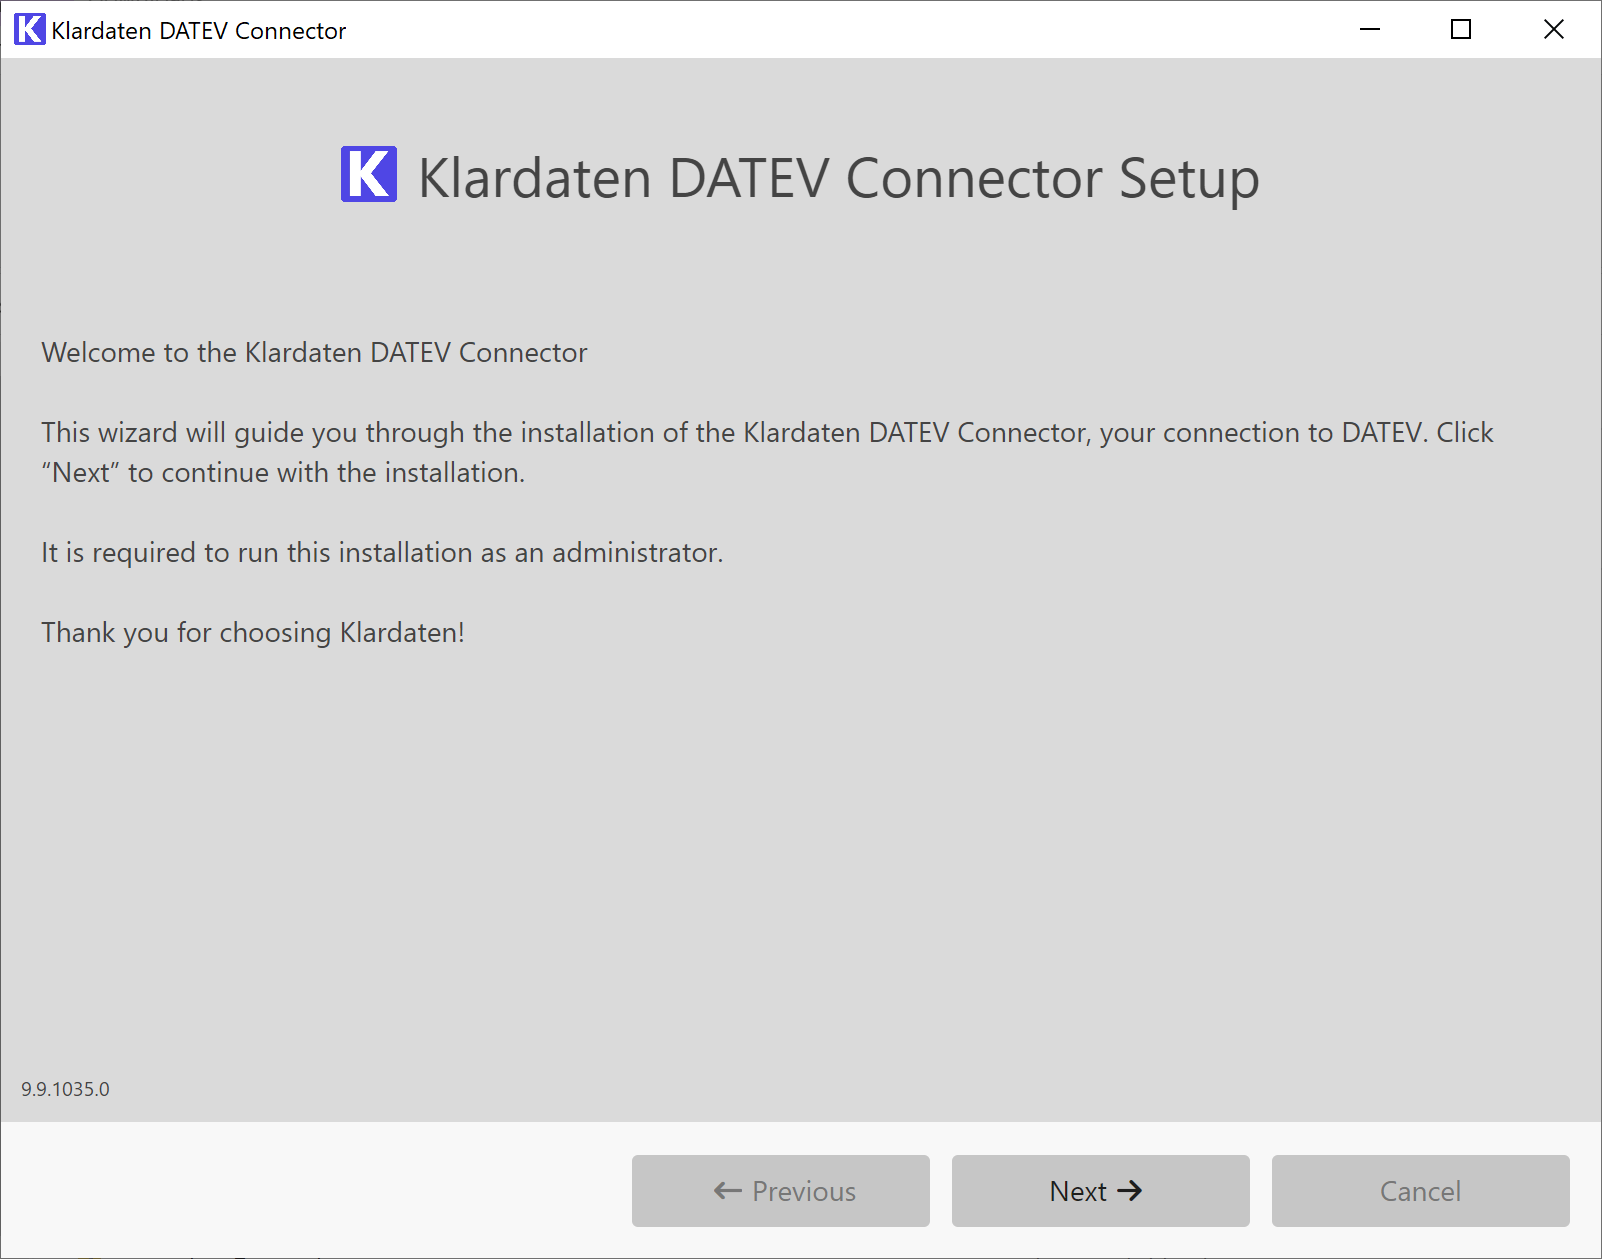
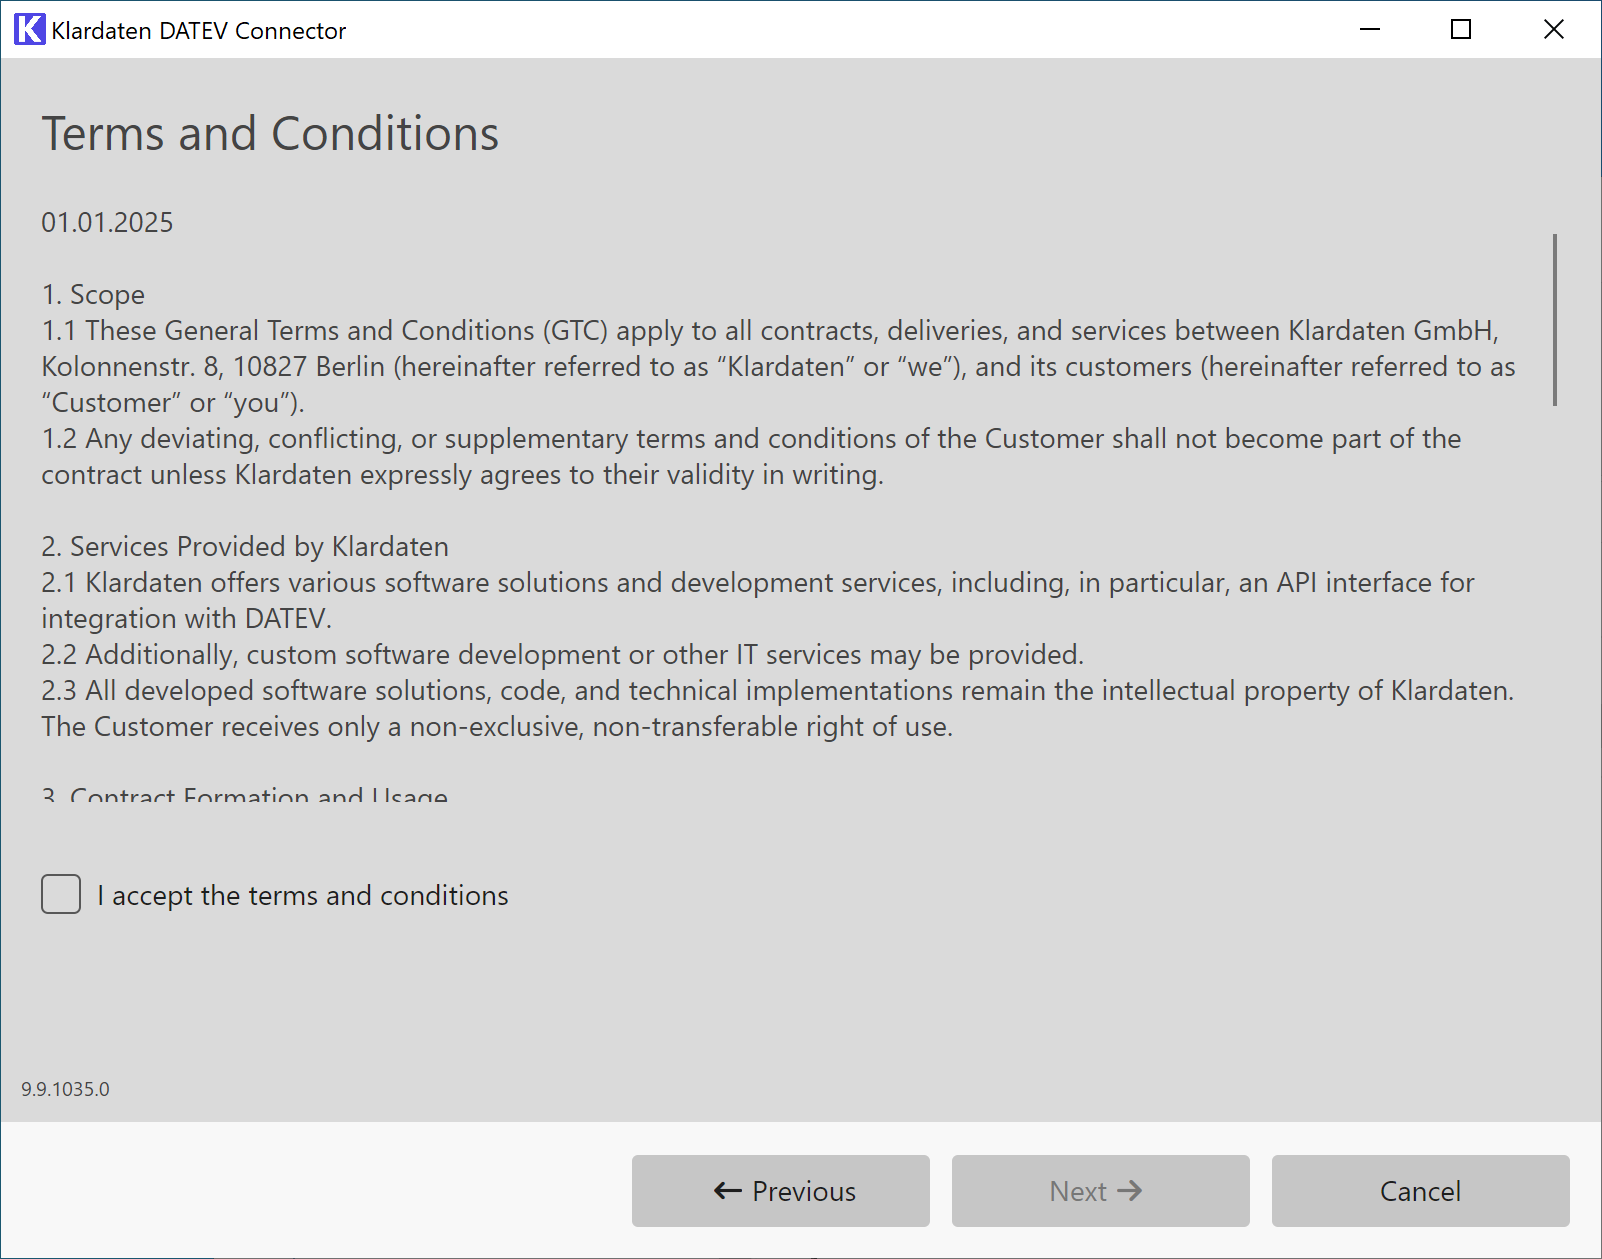
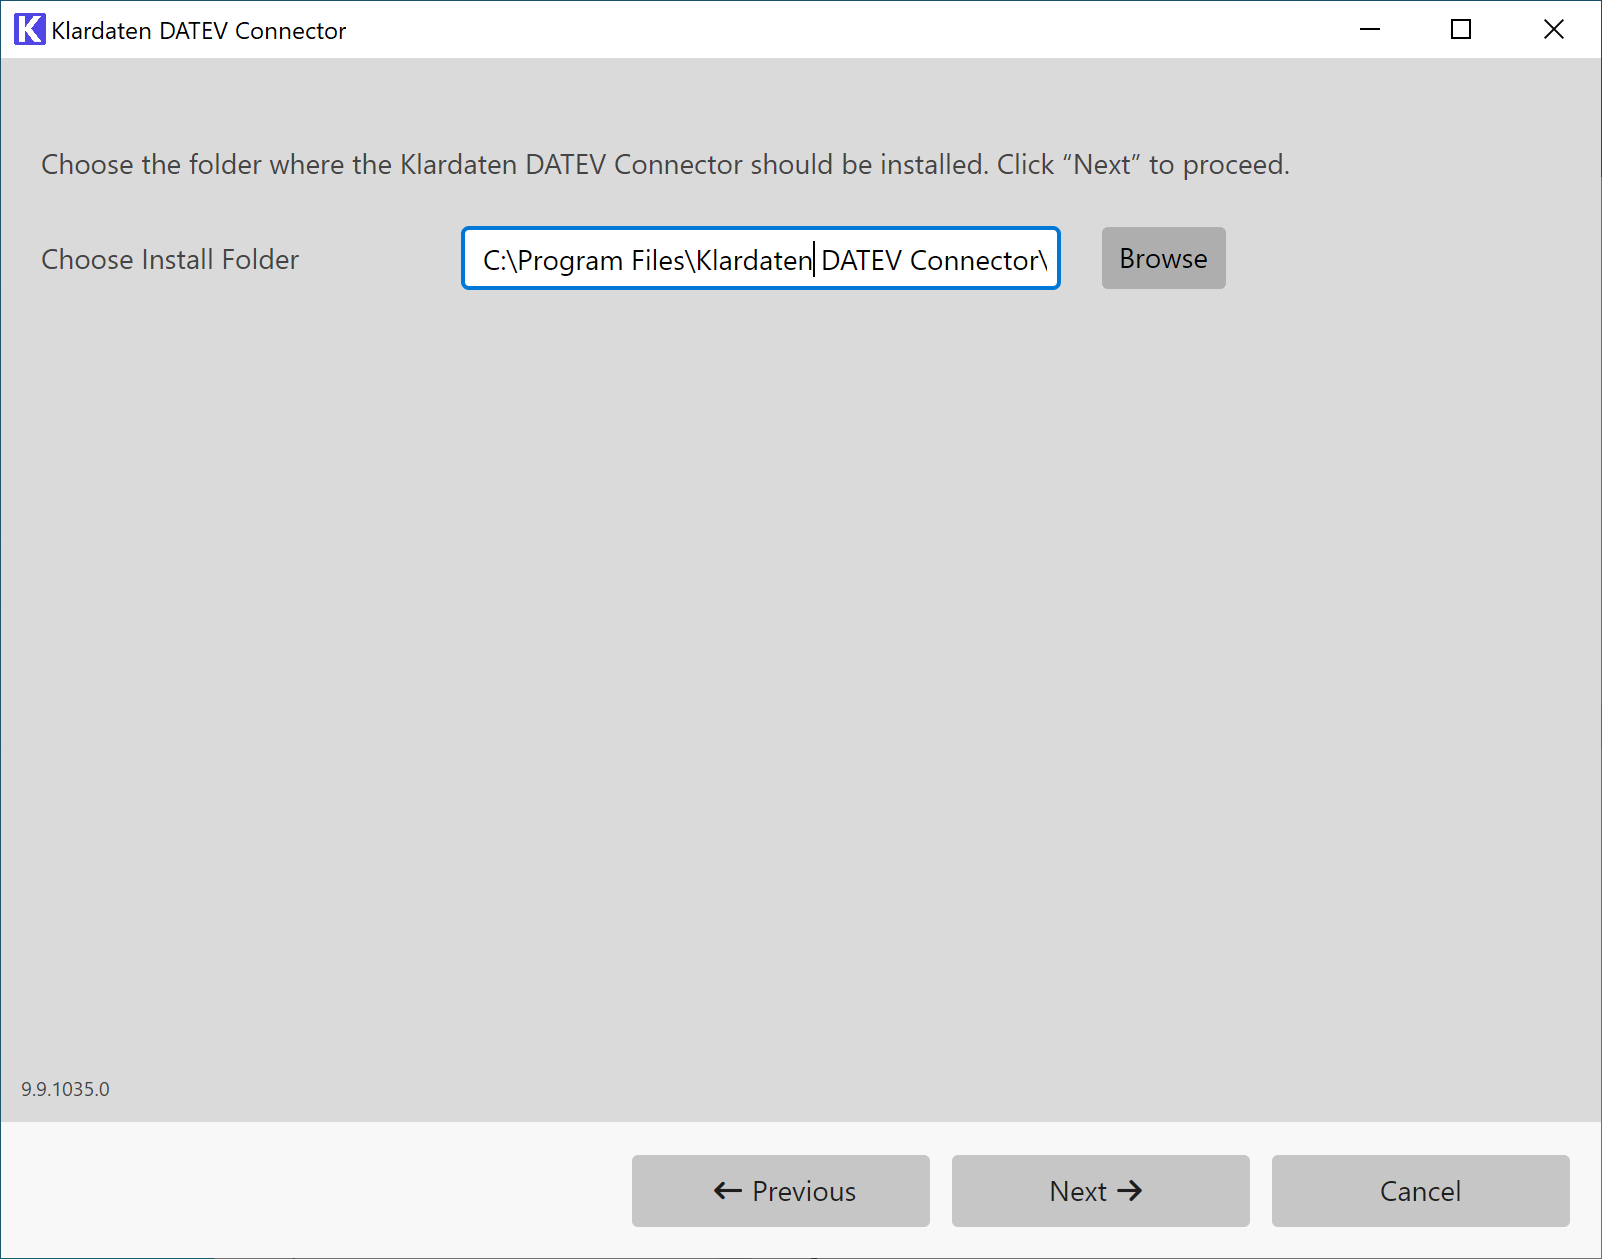
The following sequence shows the typical installation flow via the UI. The first dialog only appears if an older installation already exists.
1. Notice about an existing older installation
If an older version is already installed, it should usually be uninstalled first.
2. Welcome to the setup
Review the installation notice briefly and continue with Next.
3. Accept the terms
Read the terms and enable the checkbox so you can continue.
4. Choose the installation folder
Keep the suggested folder or select a different installation path if needed.
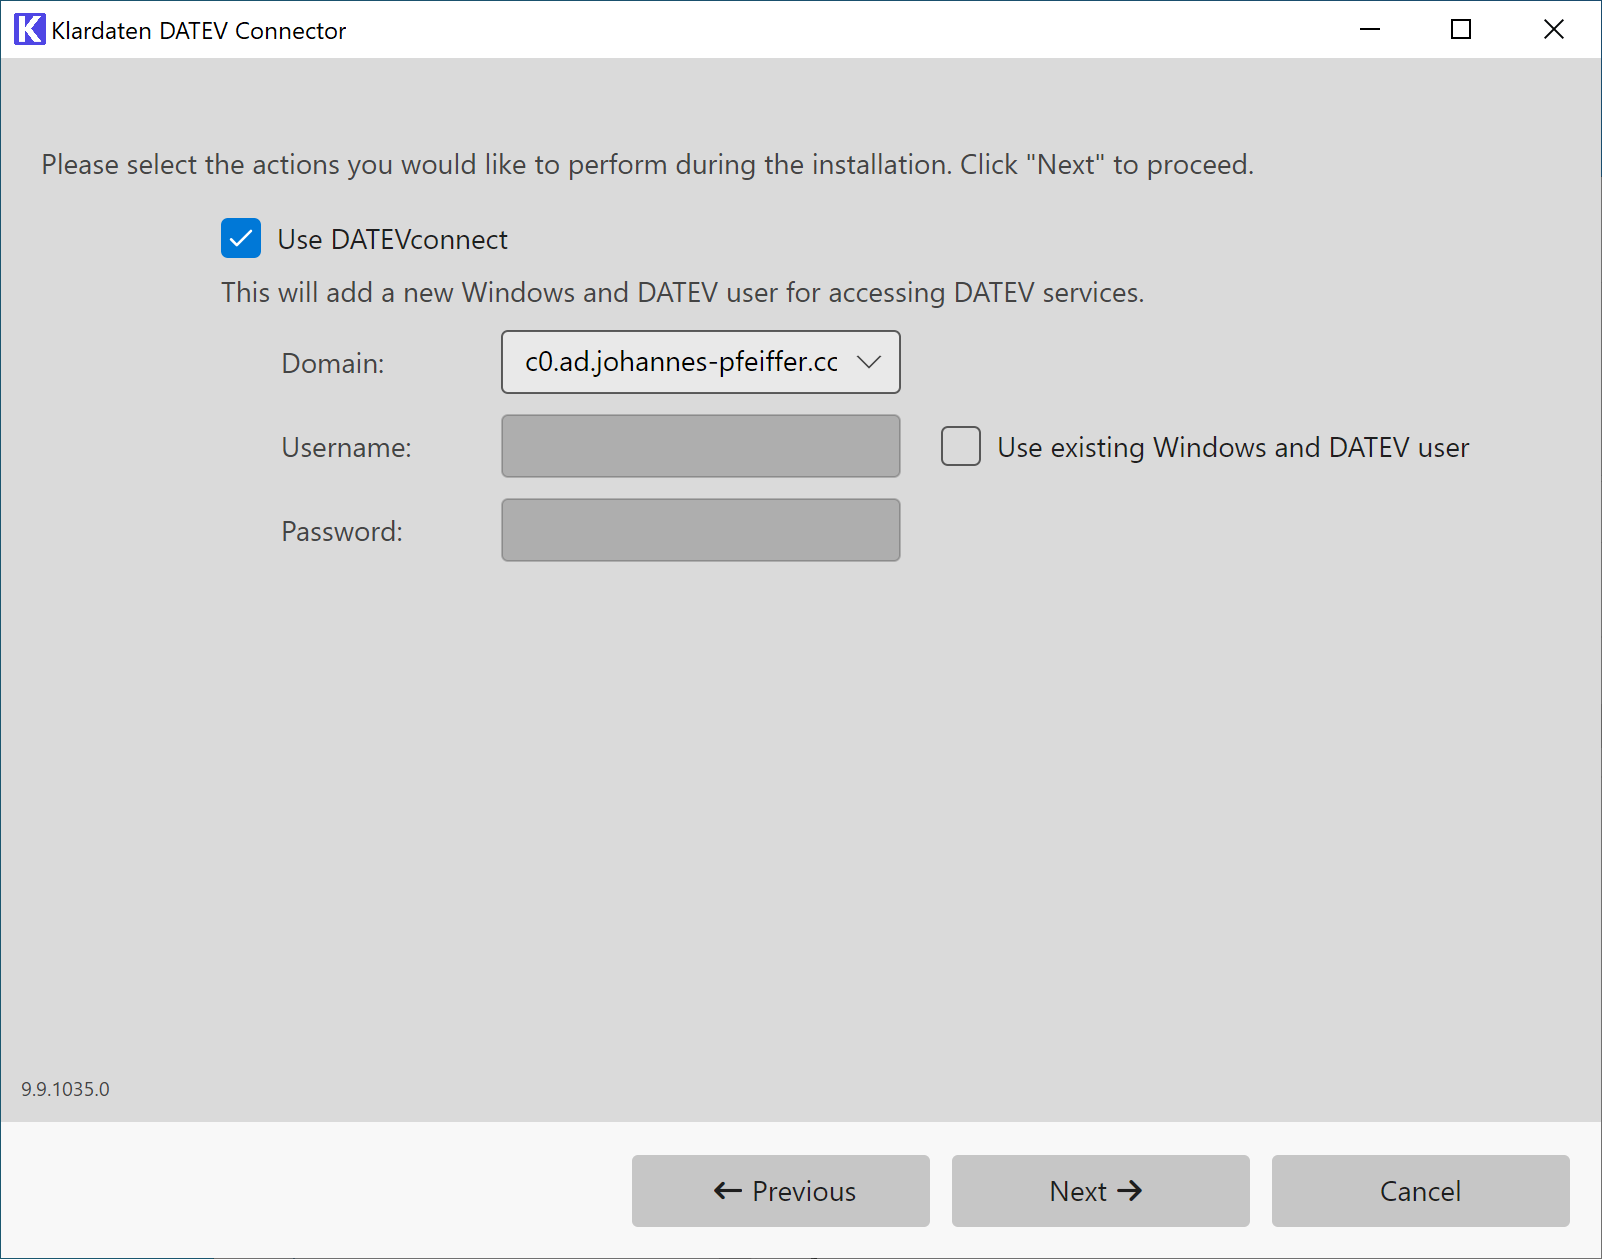
5. Configure the DATEVconnect user
Define whether a new Windows and DATEV user should be created or whether an existing user should be used.
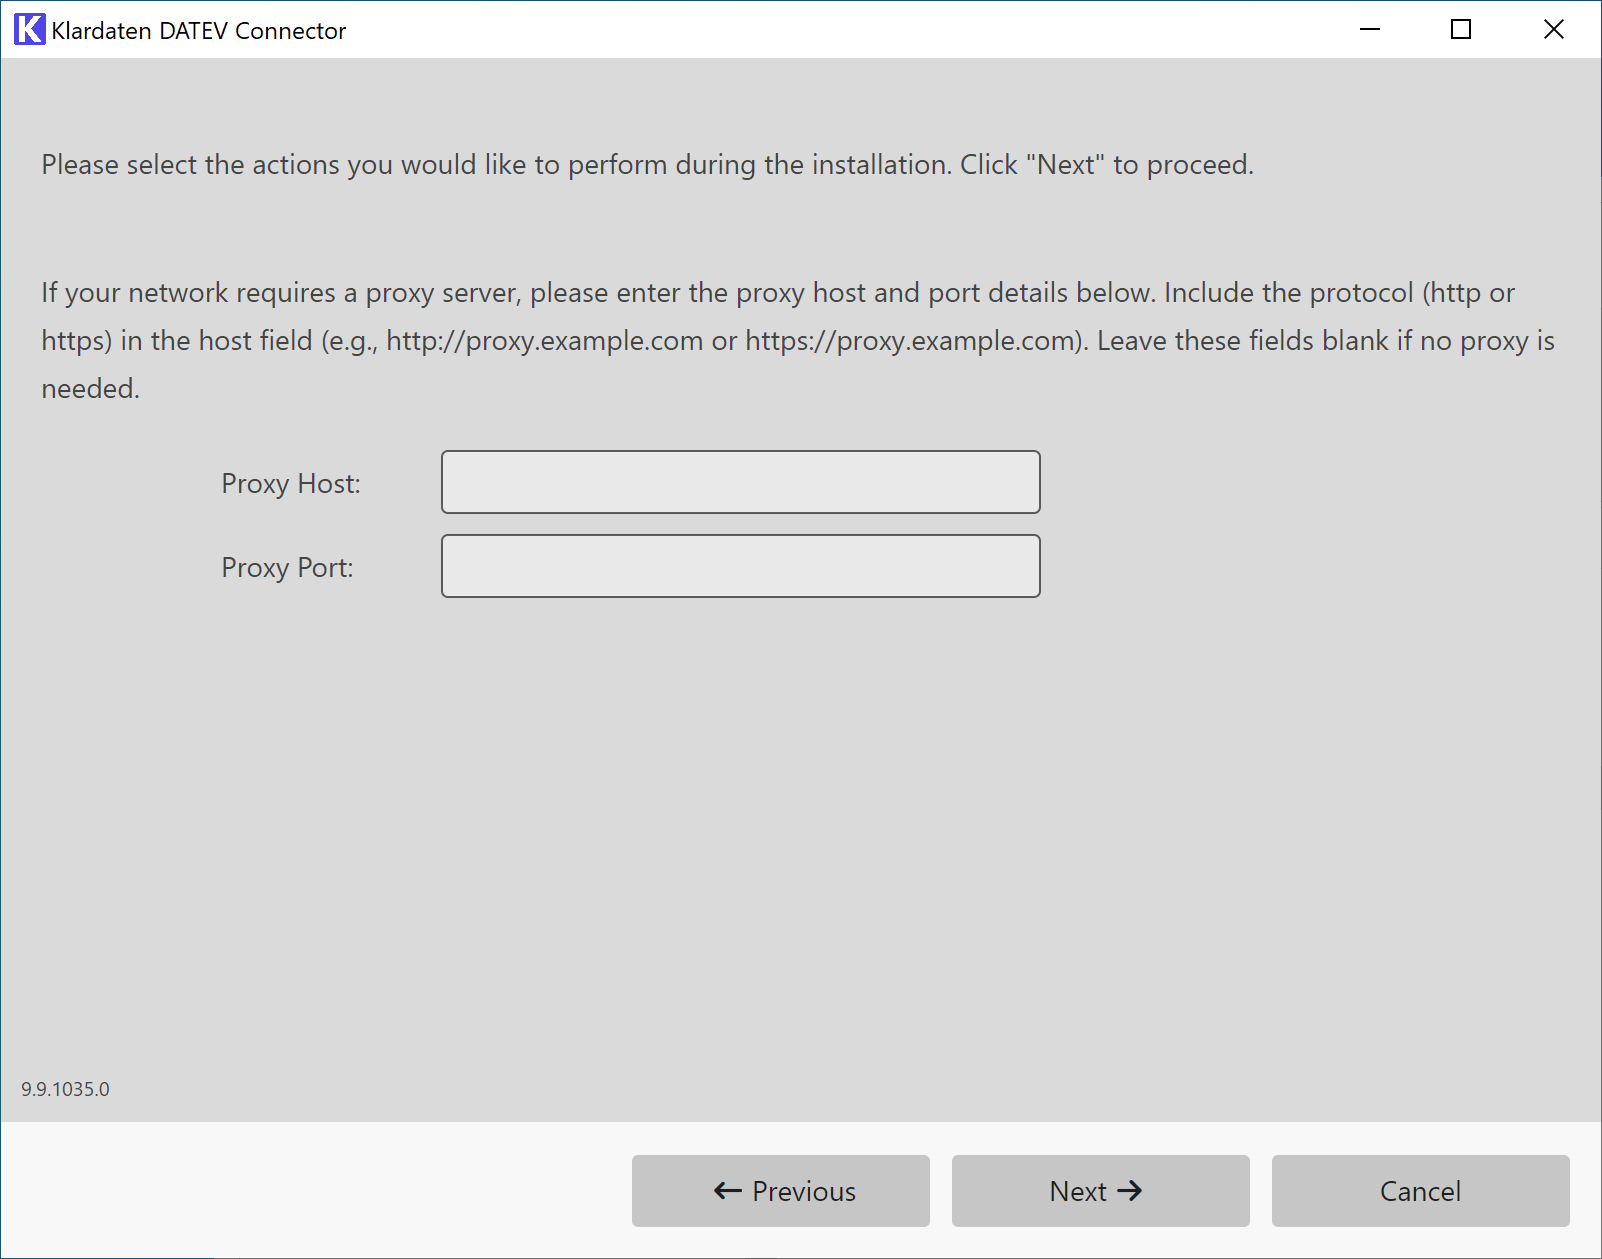
6. Enter proxy settings if required
The settings are usually detected automatically. Enter proxy host and proxy port only if your environment requires a proxy and the values were not picked up automatically.
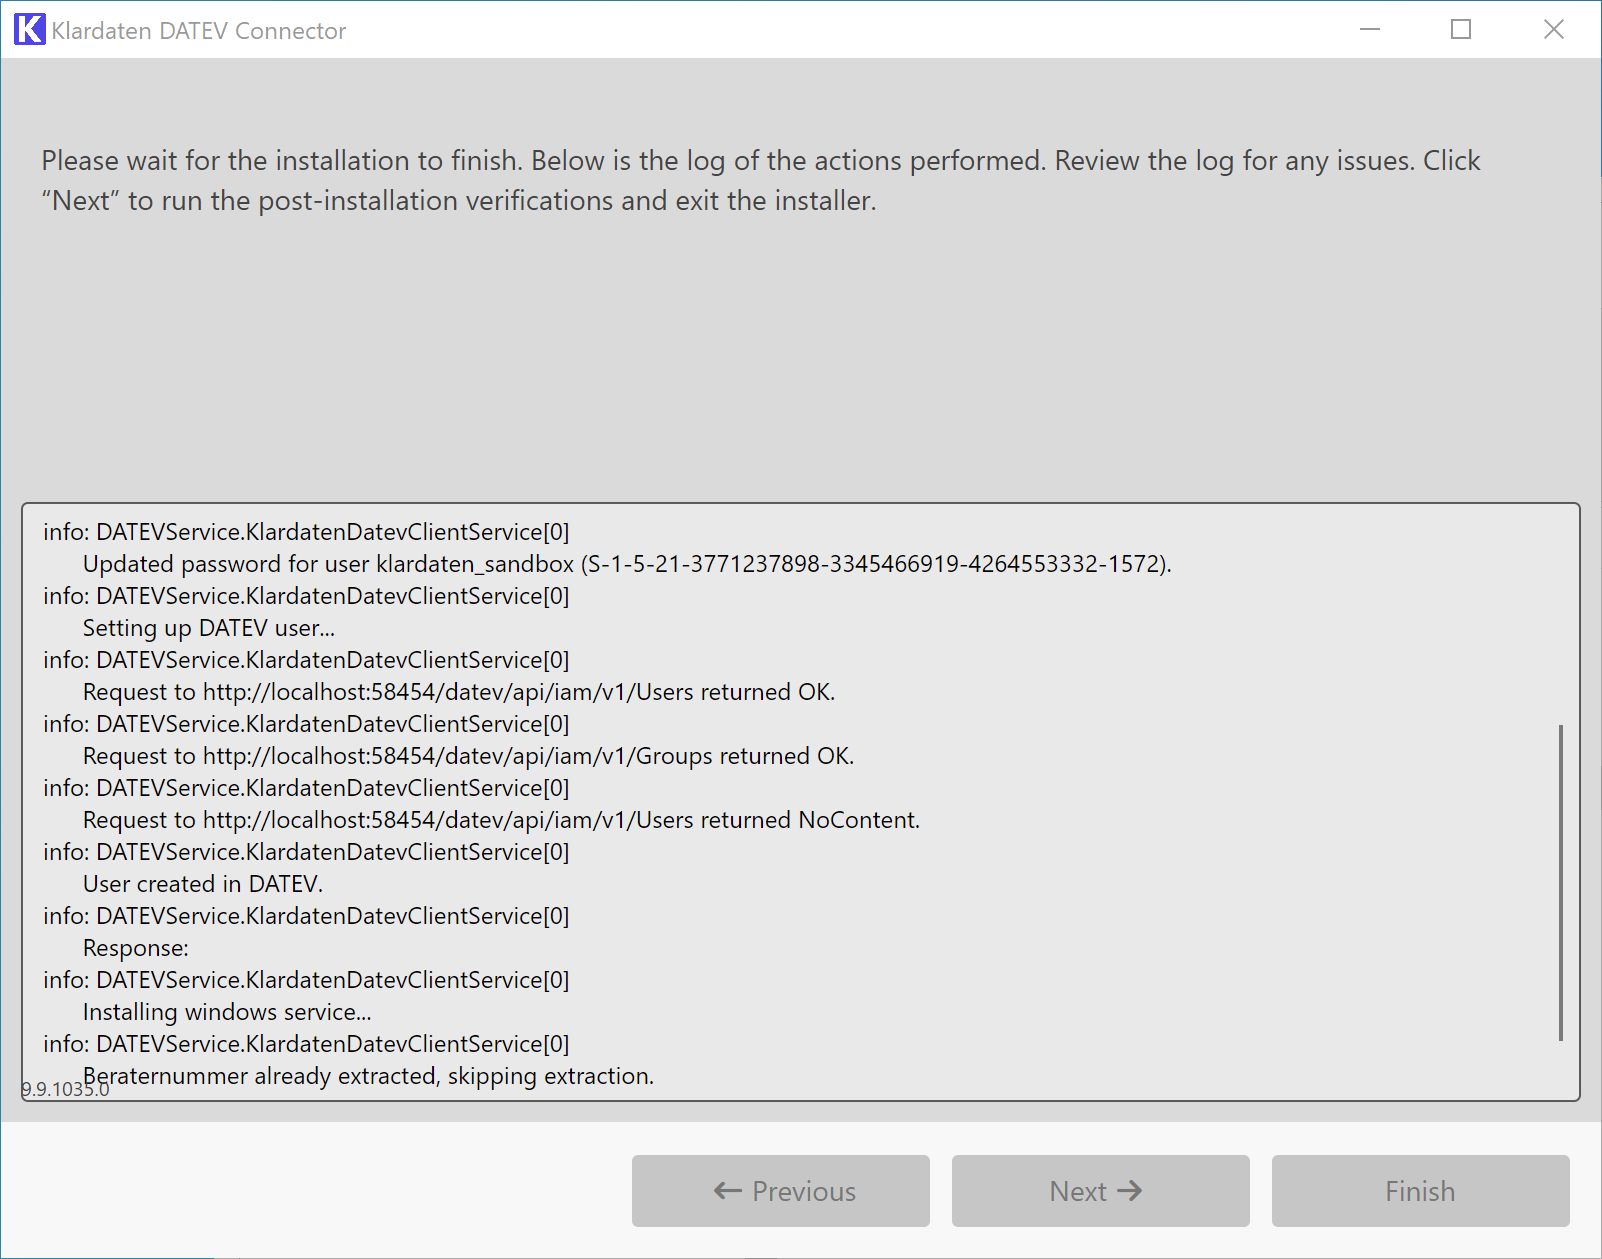
7. Installation and log
Wait until the installation is complete and review the log for warnings or errors.
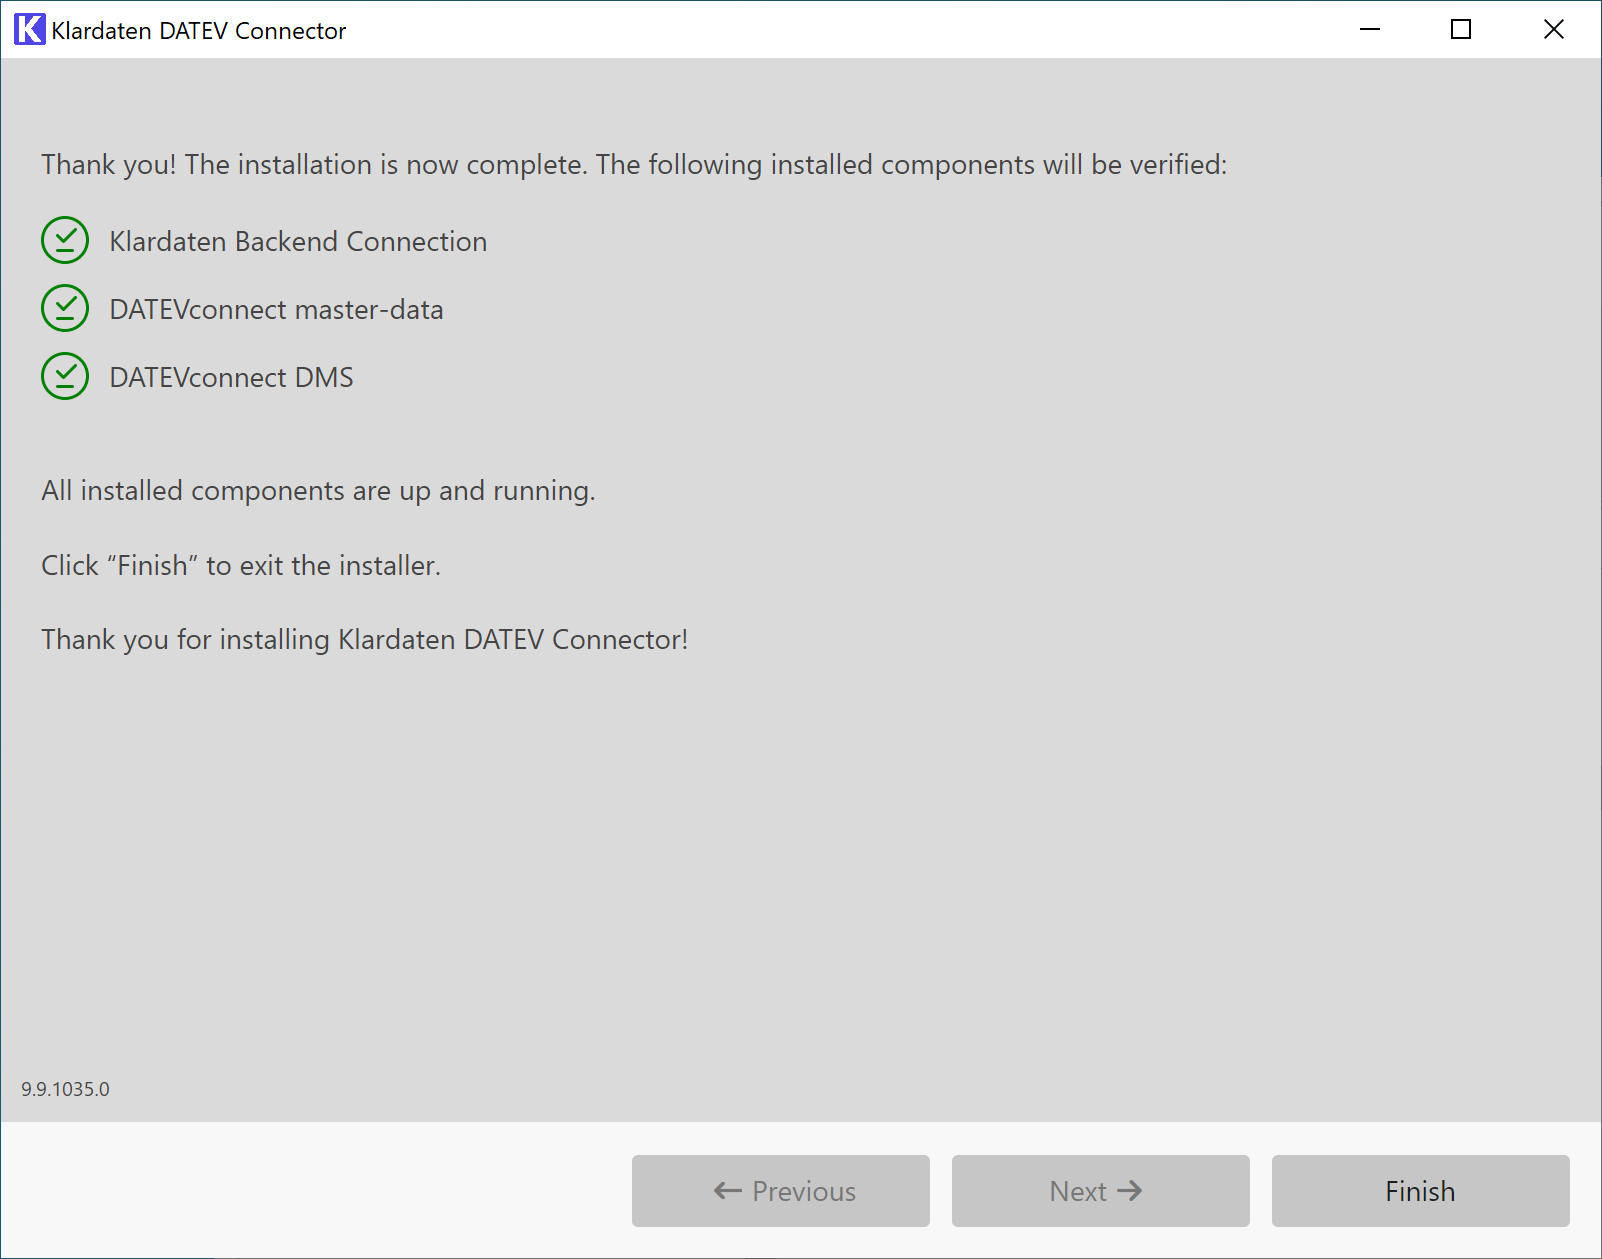
8. Final check after installation
Verify that all components were checked successfully and then close the installer.
Set Up the Windows User
There are two ways to set up the Windows user. Use either A or B:
A. Let the Installer Create a New Windows User
In the installer, a Windows user named klardaten can be created and added to the Domain Users group.
- By default, the current user's domain is used.
- If required, the domain can be adjusted manually.
- If
Domain Usersdoes not have access to the DATEV network drive, add the user to the correct group with that access instead. - Do not use
SYSTEMor local admin groups for this. - The installer also creates a matching DATEV user and adds it to the
Alle Freigabengroup configured inDATEVconnect.DatevGroup. - If one of the required users already exists, it is reused instead of being created again.
B. Use an Existing Windows User
You can also prepare your own Windows user and link it manually to a DATEV user.
- If you are a DATEVasp customer, use DATEV's article for creating an additional Windows user: https://apps.datev.de/help-center/documents/1008336
- Then log in to DATEV Arbeitsplatz with an administrator and create a DATEV user linked to that Windows account.
- Assign the required DATEV permissions.
- Start DATEV Arbeitsplatz at least once with that user.
- Depending on the environment, an initial Windows login with that user may also be required so the password can be set or changed.
If you install the Klardaten service with an existing user, the username, domain, and password must be set explicitly. The concrete parameters for that are documented in the Command Line Installation chapter.
Required permissions for a custom Windows user
If you use your own user, it should meet at least the following requirements:
- Access to the DATEV configuration: Access to the DATEV configuration including ConfigDB, usually under
L:\. This typically requires membership in theDATEVUSERgroup. - Local login and batch login: The user must be allowed to log on locally and as a batch job (
SeInteractiveLogonRight,SeBatchLogonRight). - Link to DATEV Arbeitsplatz: The Windows user must be linked to a DATEV user in DATEV Arbeitsplatz.
Required DATEV rights
The linked DATEV user must either have Alle Freigaben or at least the following reduced permission set:
Globalrechte -> Berater/Mandant -> Beraternummer/MandantnummerGlobalrechte -> Zentrale Stammdaten -> MandantenGlobalrechte -> Zurückschreiben in die StammdatenProgramme -> DATEVconnectProgramme -> RechnungswesensystemeProgramme -> EigenorganisationProgramme -> DATEV Arbeitsplatz