Note for SmartIT customers
The profile setup described on this page does not apply to SmartIT. Setup works differently there. Please contact support@klardaten.com.
Default: one shared DATEV user
By default, all MCP connections for a DATEV instance use the shared service profile. DATEV therefore processes their requests using the same Windows/DATEV user and the same DATEV permissions.
When is an individual profile useful?
Create a separate profile when an MCP connection should use a different DATEV user. The data returned via MCP is then limited to what that user is permitted to see in DATEV.
- Employees should only be able to see the clients, documents, or modules they need for their work.
- Sensitive areas such as the firm's own payroll or management's personal tax documents should not be visible through every MCP connection.
- An AI or automation connection should operate according to the principle of least privilege instead of using the shared permission context.
Recommended: use a profile-specific setup link
In the customer portal, you can create a short-lived MCP URL that is tied to a specific DATEV instance and profile.
- Open the Klardaten customer portal, select the relevant DATEV instance, and open the Profiles tab.
- For an existing profile, click Copy MCP setup link. For a new profile, click Create custom link, enter a unique profile ID, and select Create and copy setup link.
- Send the copied link to the person configuring the MCP connection.
- In the MCP client, use this setup link as the server URL instead of the general Klardaten MCP endpoint and start the connection.
- If the profile does not exist yet, enter the Windows username and password of the DATEV user and select Create and authorize. An existing profile is connected directly.
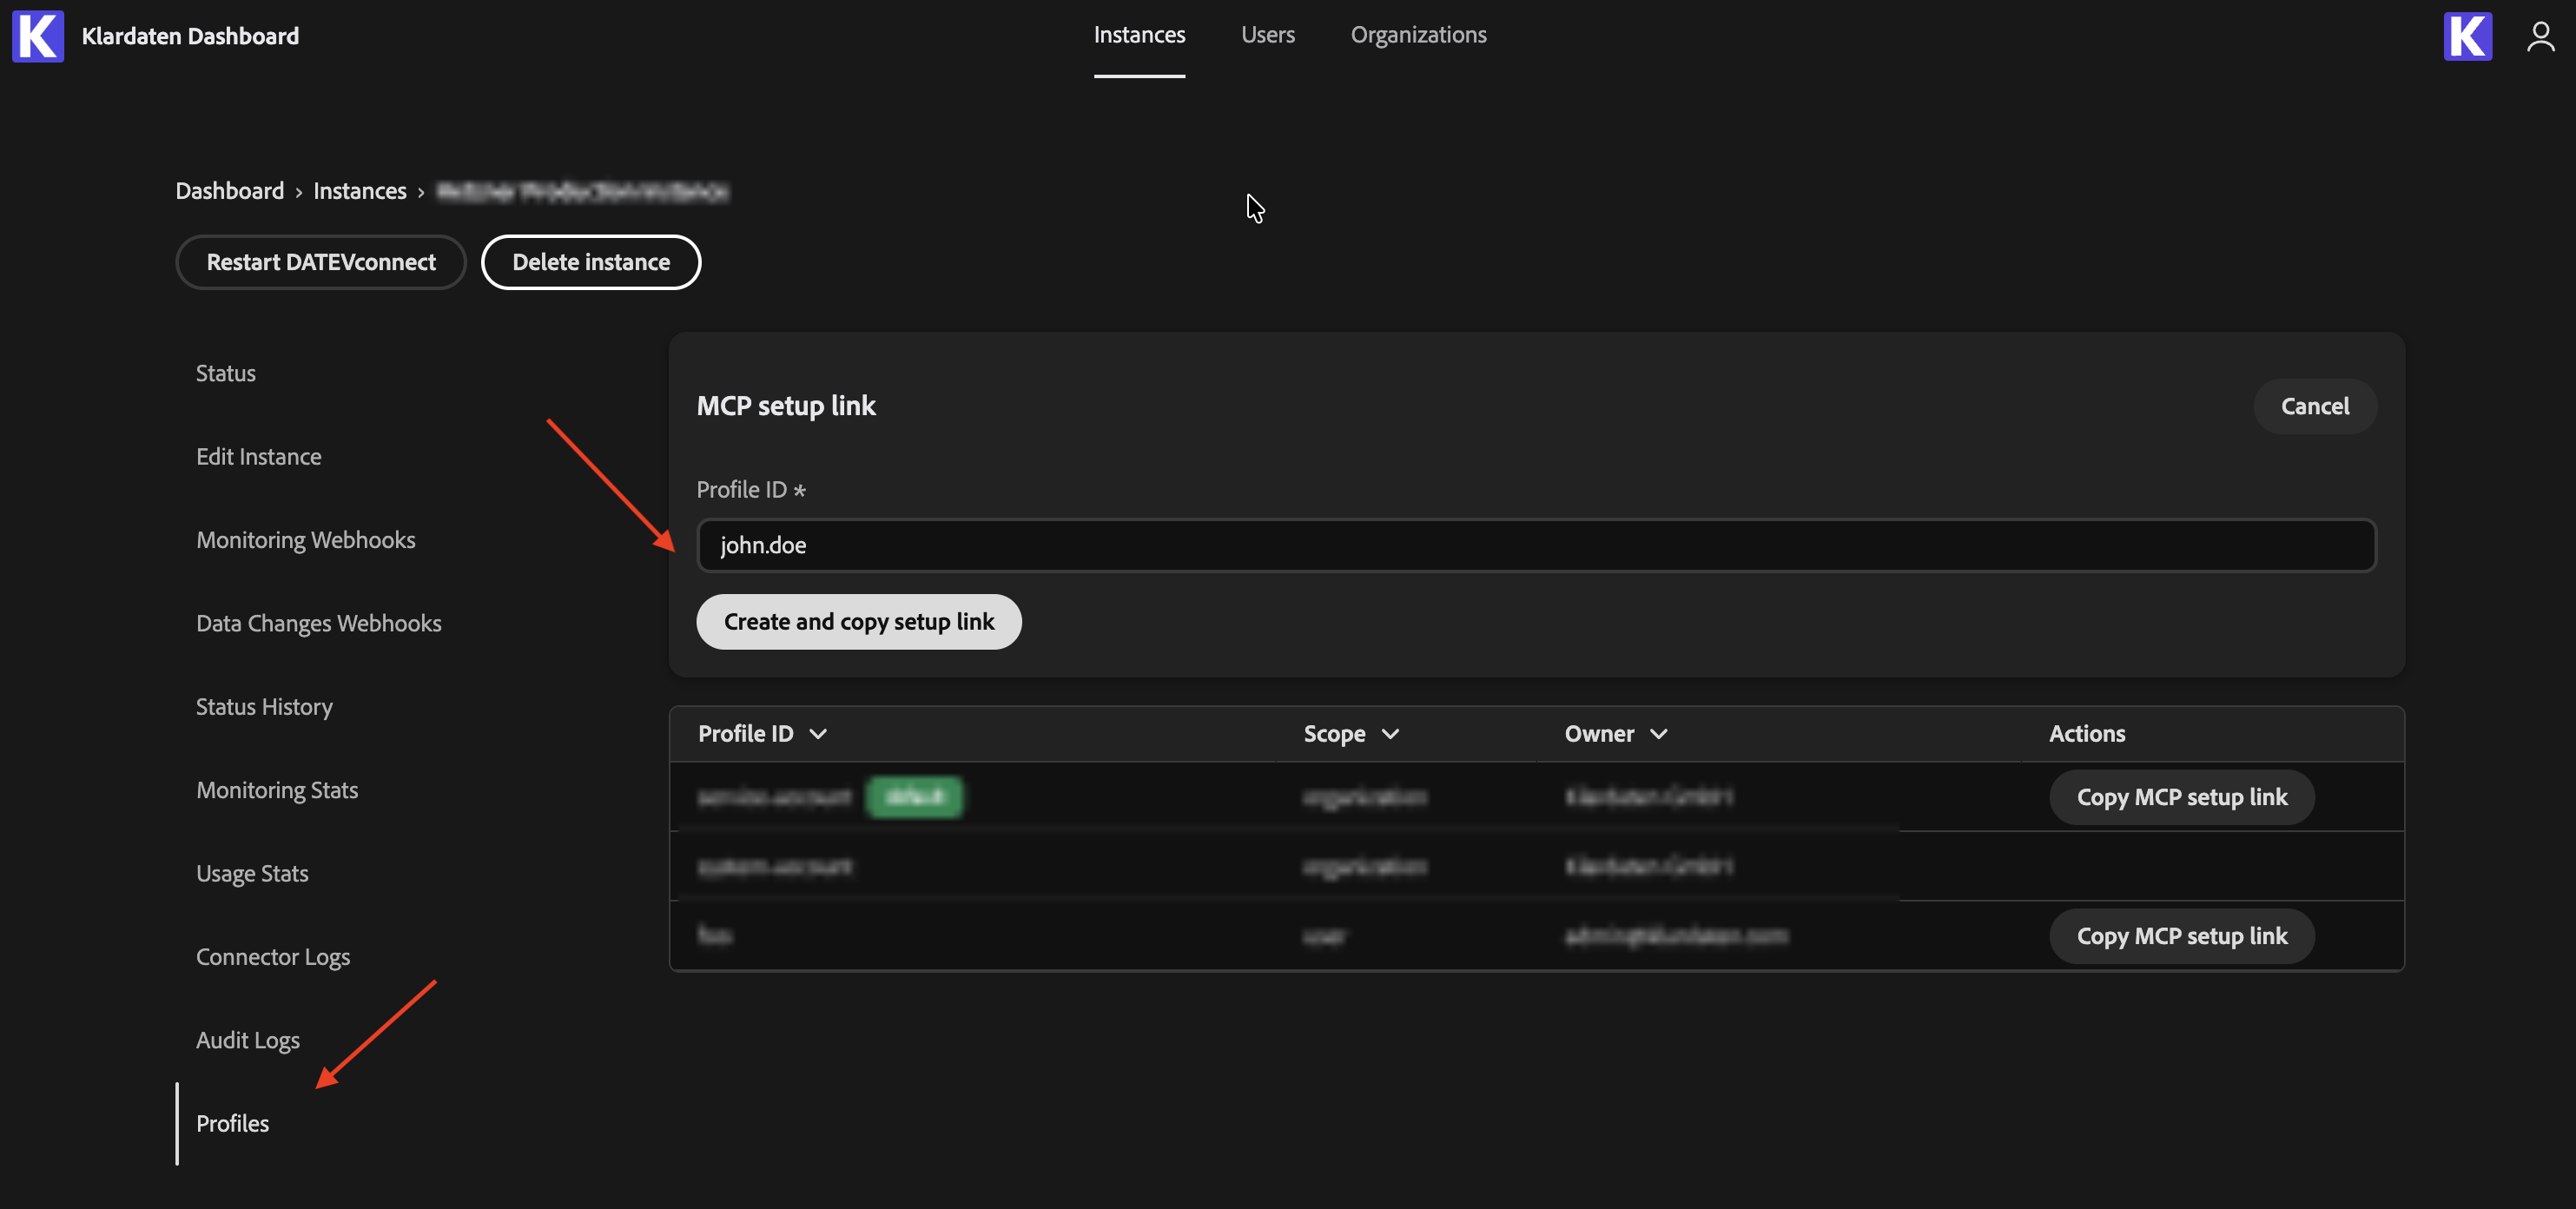
A setup link can only be used once and expires after two hours. If it has expired or has already been used, create a new link in the customer portal.
Alternative: select a profile in the regular OAuth flow
When you connect with the standard endpoint https://api.klardaten.com/mcp, sign in to Klardaten, select the DATEV instance, and then choose an existing DATEV profile or create a new one. This is useful when the person configuring the client should choose the profile themselves.
What determines which DATEV data is visible?
- The selected Windows/DATEV user's permissions in DATEV determine which data can be read.
- A profile does not grant additional DATEV permissions. It only uses the rights already assigned to that DATEV user.
- Connections using the same profile share the same DATEV permission context. Different profiles can represent different access rights.
- Write permissions must be approved separately; write actions are recorded in the audit log regardless of which profile is used.
Choose a profile ID
Use a short technical name such as first-name-last-name. Profile IDs are converted to lowercase and may contain letters, numbers, periods, underscores, tildes, and hyphens, but no spaces.