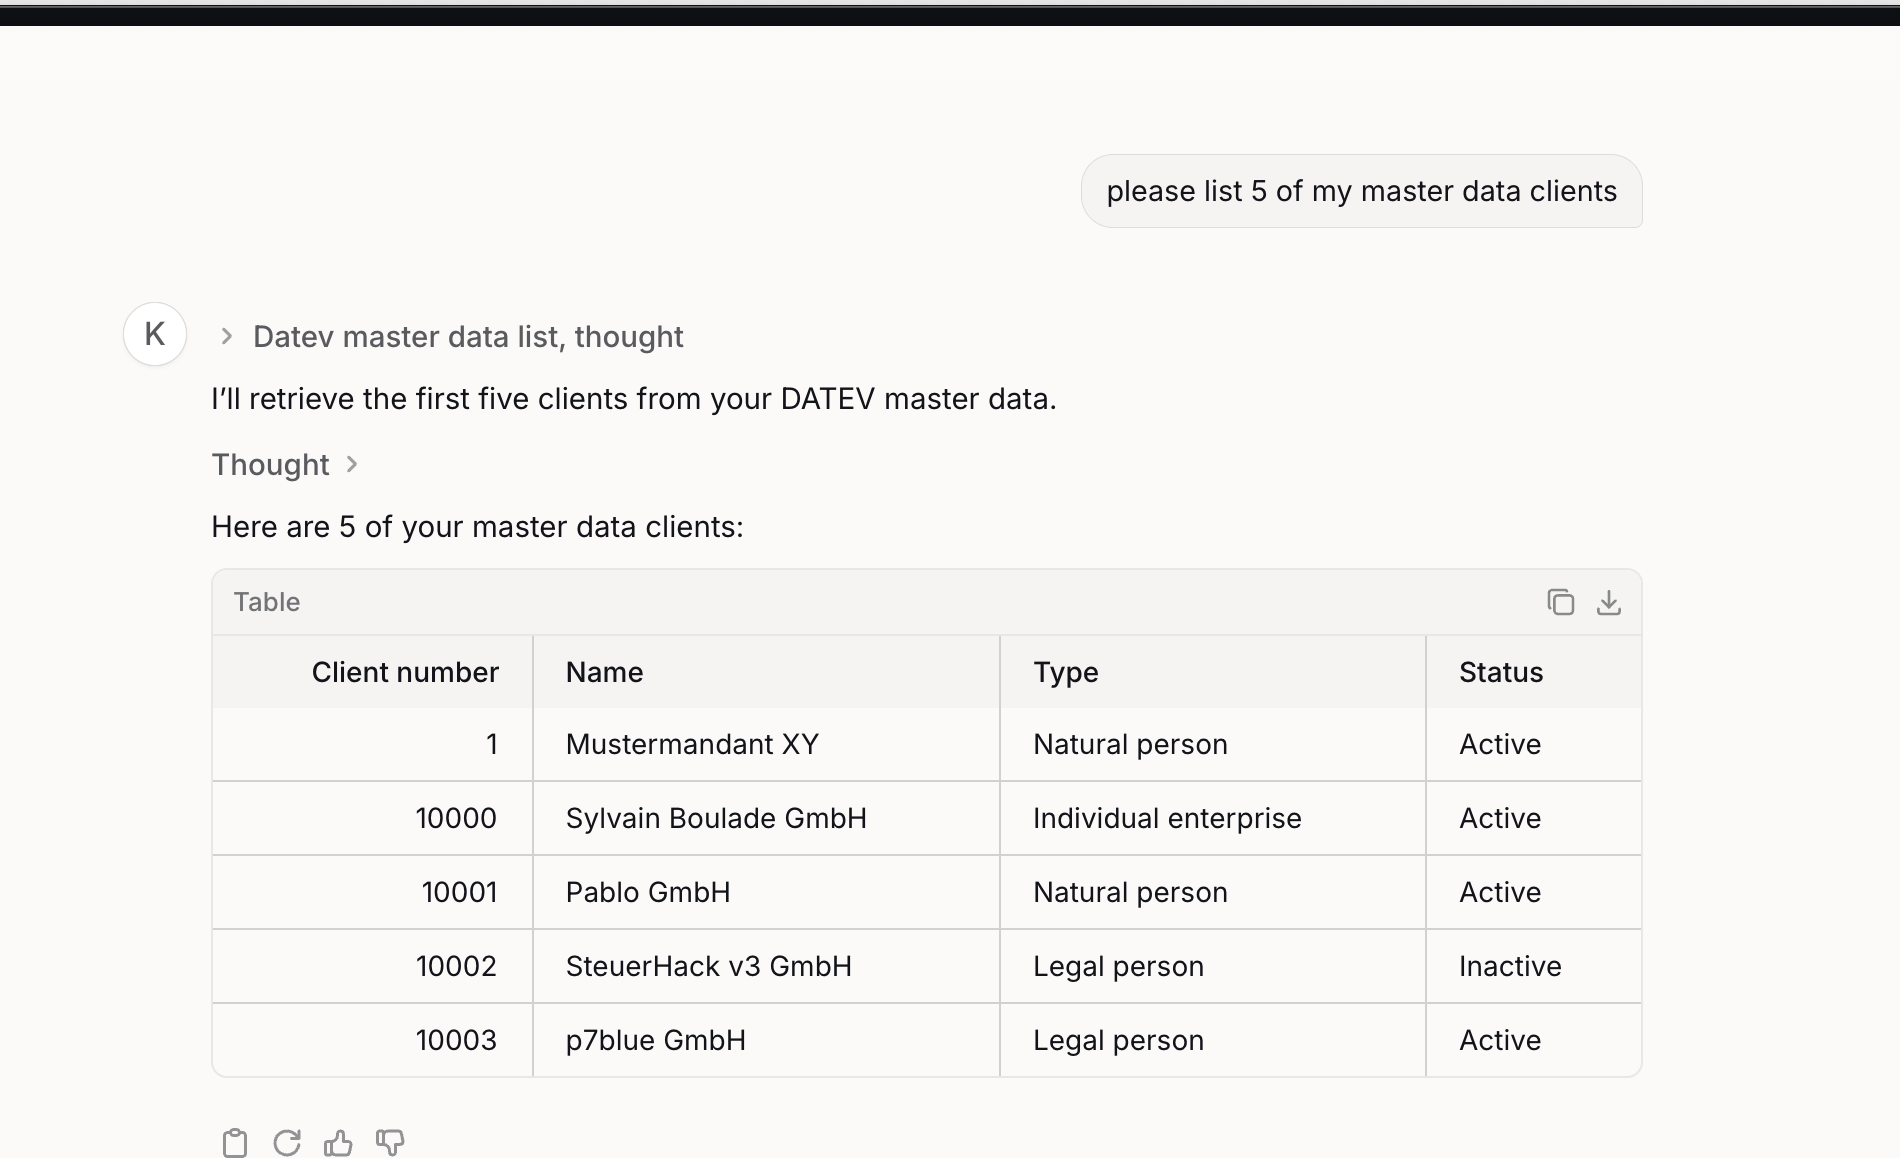
Set up a personal connection
Use this setup when each Langdock user should connect their own Klardaten account.
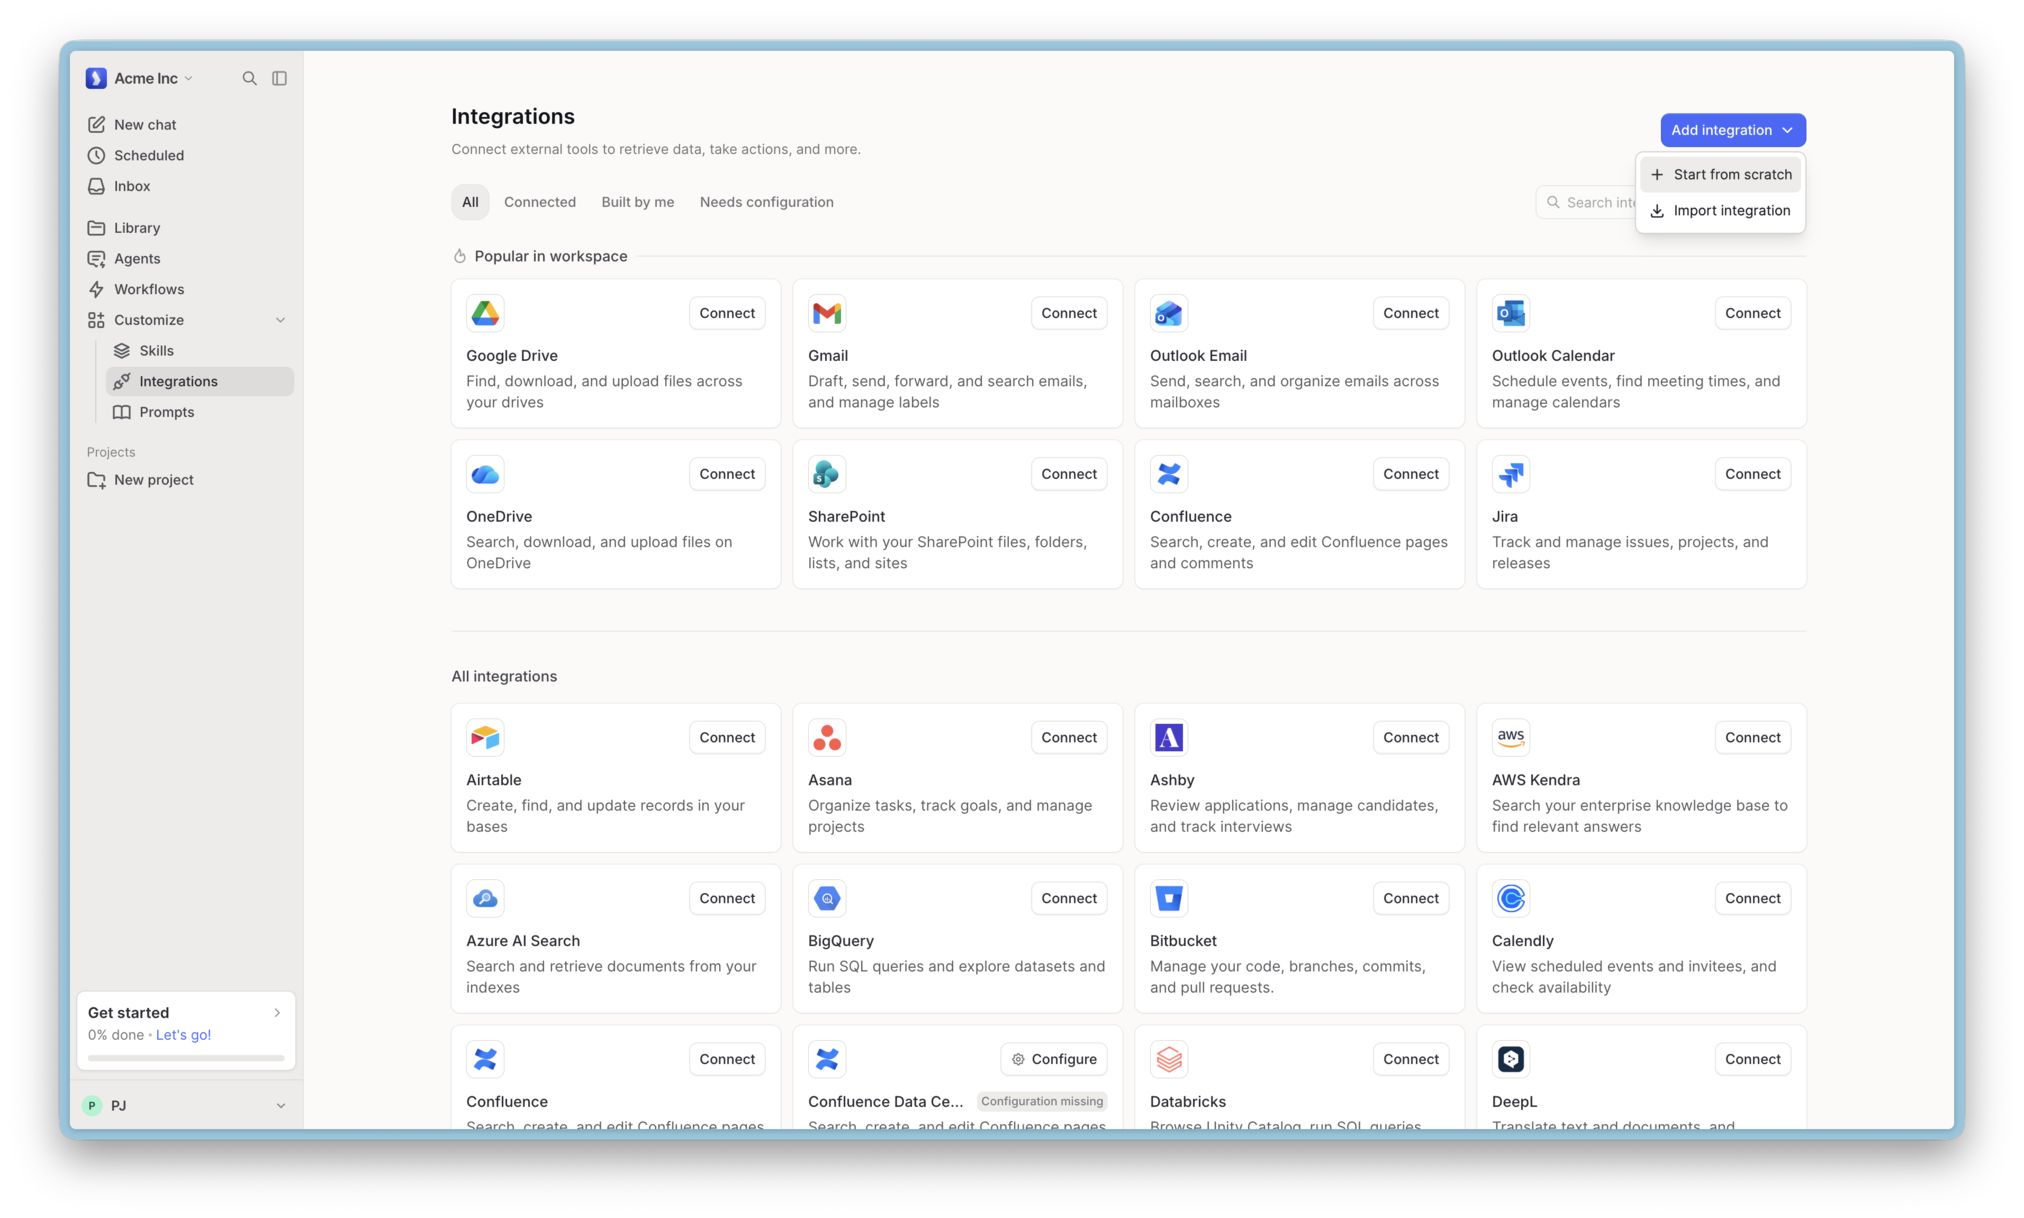
- In the left sidebar, open Customize and select Integrations.
- Click Add integration in the top right, then select Start from scratch.
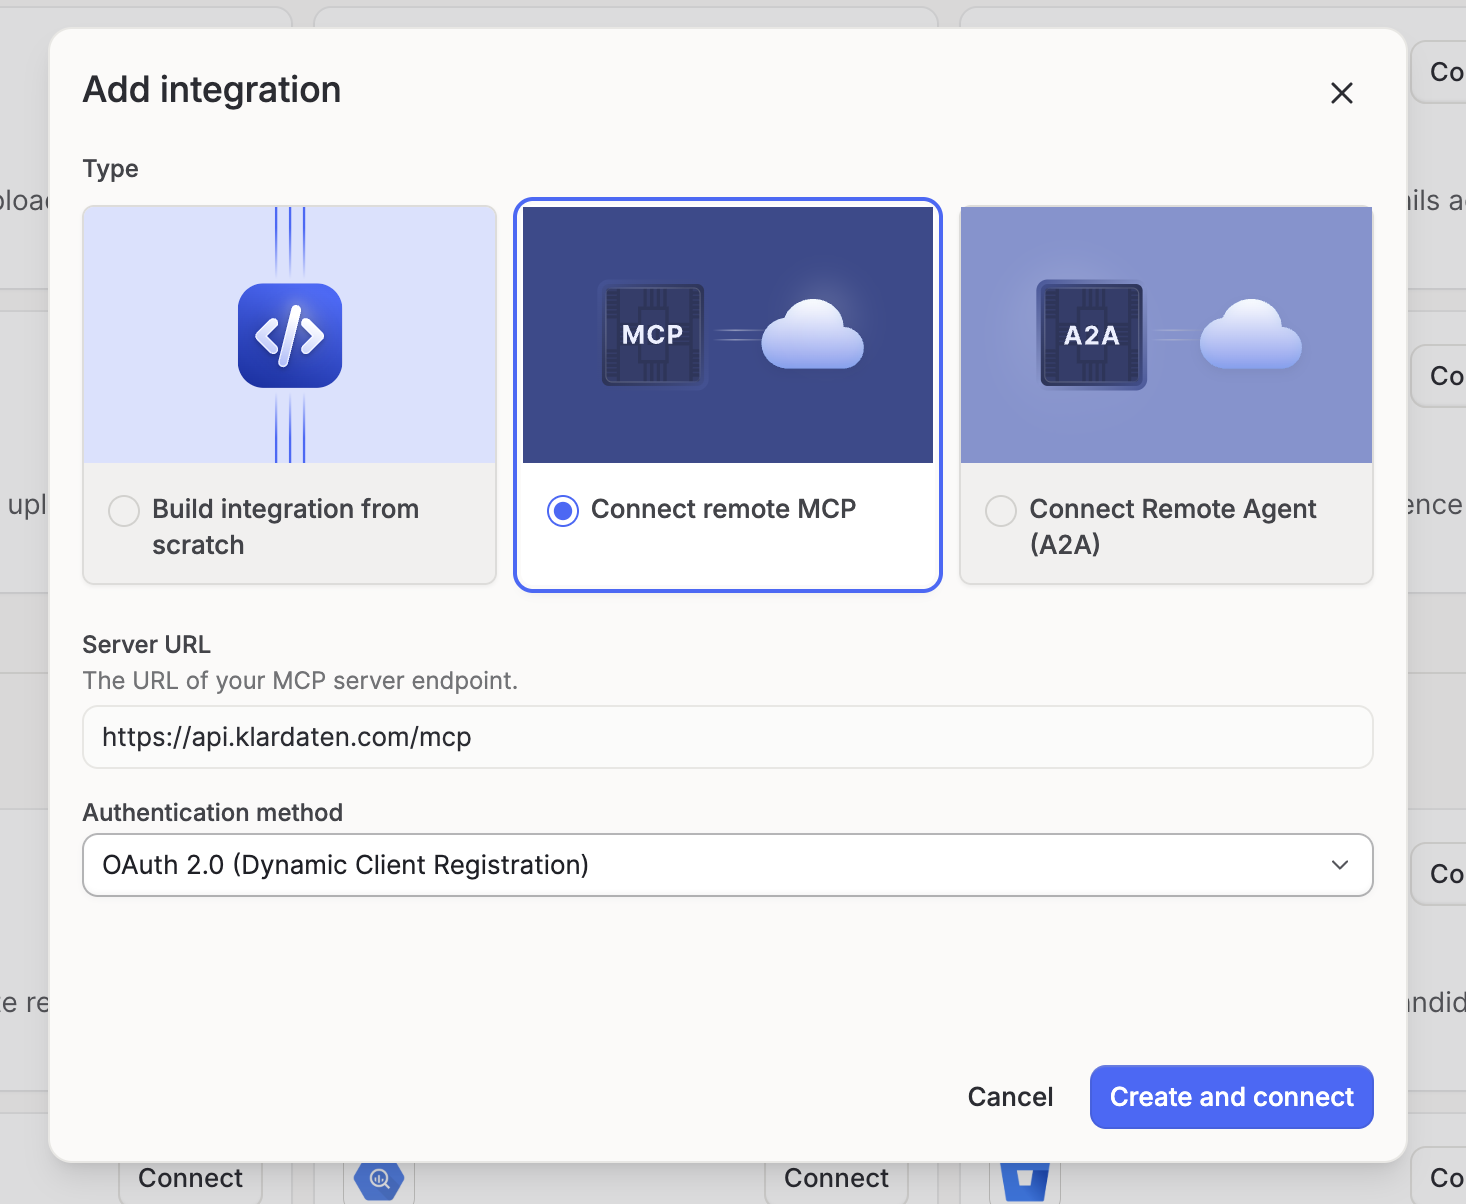
- In the dialog, select Connect remote MCP.
- Enter the connection details:
- Server URL:
https://api.klardaten.com/mcp - Authentication method: OAuth 2.0 (Dynamic Client Registration)
- Server URL:
- Click Create and connect.
- Complete the Klardaten OAuth flow using your Klardaten credentials, an API key, or an MCP link.
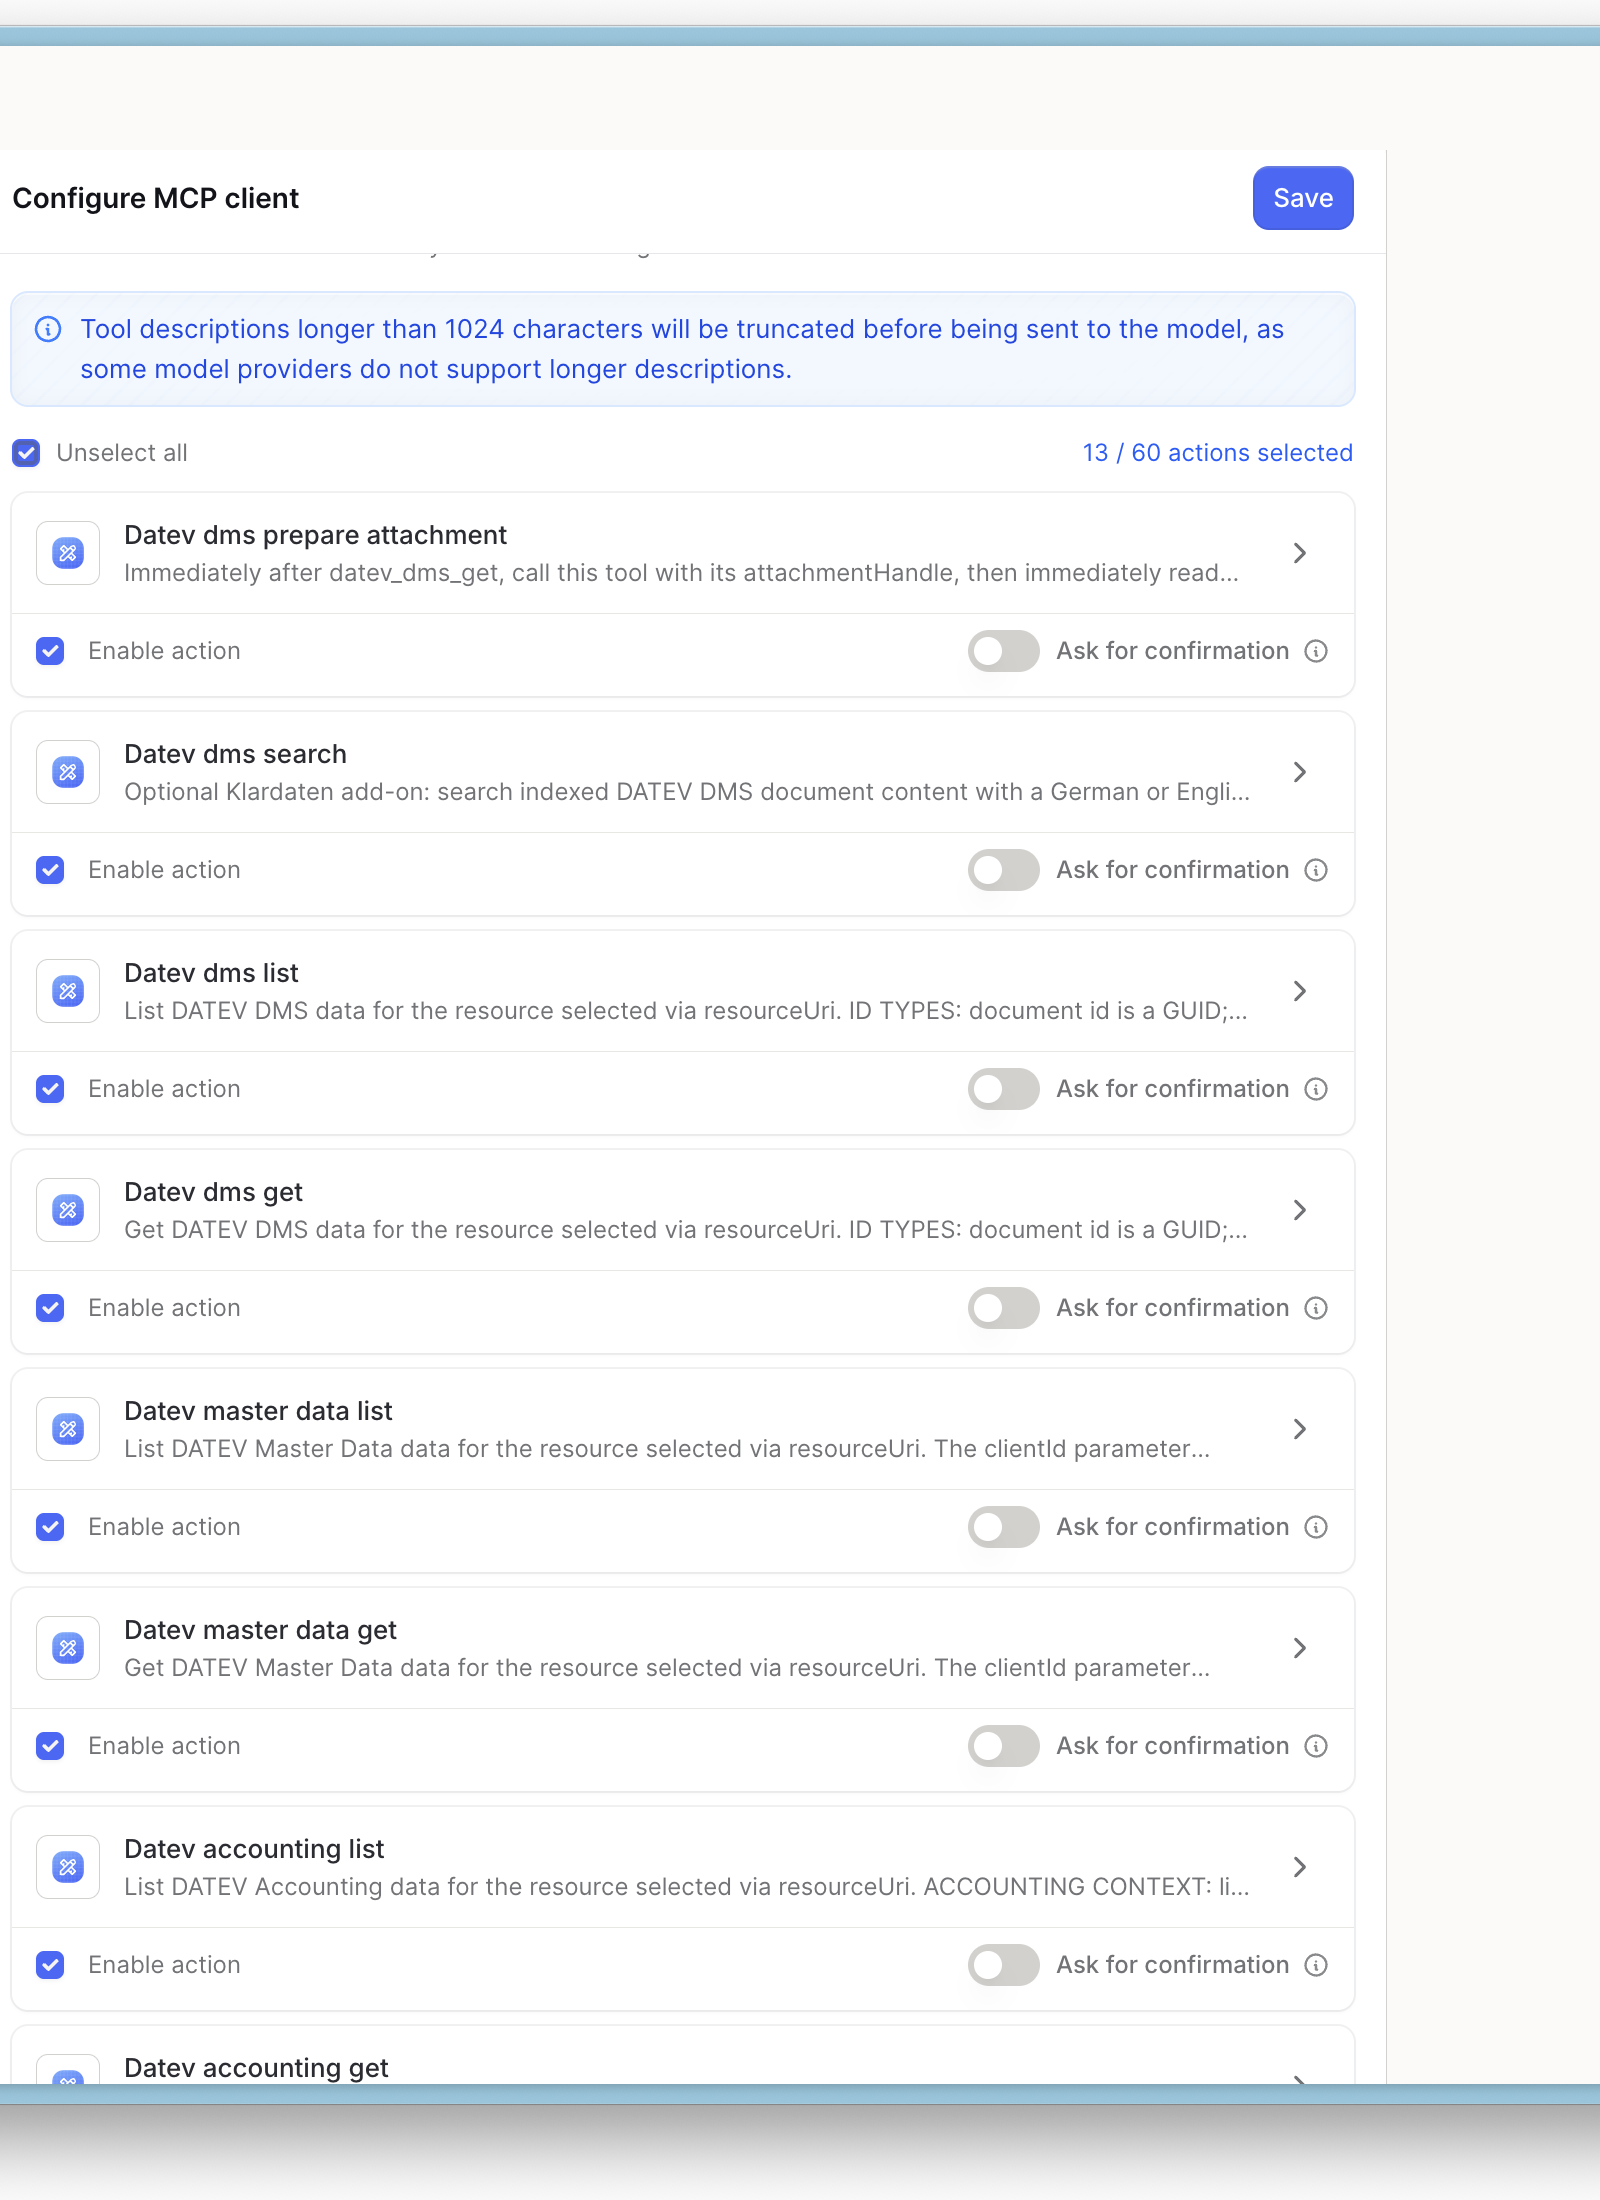
- When Langdock displays the available actions, enable all Klardaten tools and resources, then click Save. One integration covers the full Klardaten MCP surface.
OAuth connections are personal
Sharing the integration itself does not share its OAuth authorization. Other users will be asked to connect their own Klardaten account. To let several employees use one centrally managed connection, use the shared Agent setup below.
Use your personal connection
In a regular Langdock chat, tag the integration with @datevconnect-mcp to use your personal connection.
Share one connection with your organization
A shared Agent can run Klardaten actions through the connection selected by its owner. Members can use the actions, but they cannot see or access the OAuth credentials.
Permission required
The person configuring the Agent must be an Admin, an Editor, or have the "Share OAuth connections" permission.
- Open Agents, click Create agent, and then open the Agent editor.
- Give the Agent a clear name and instructions describing how it should use the Klardaten MCP tools.
- Under Integrations, click + and add the datevconnect-mcp integration.
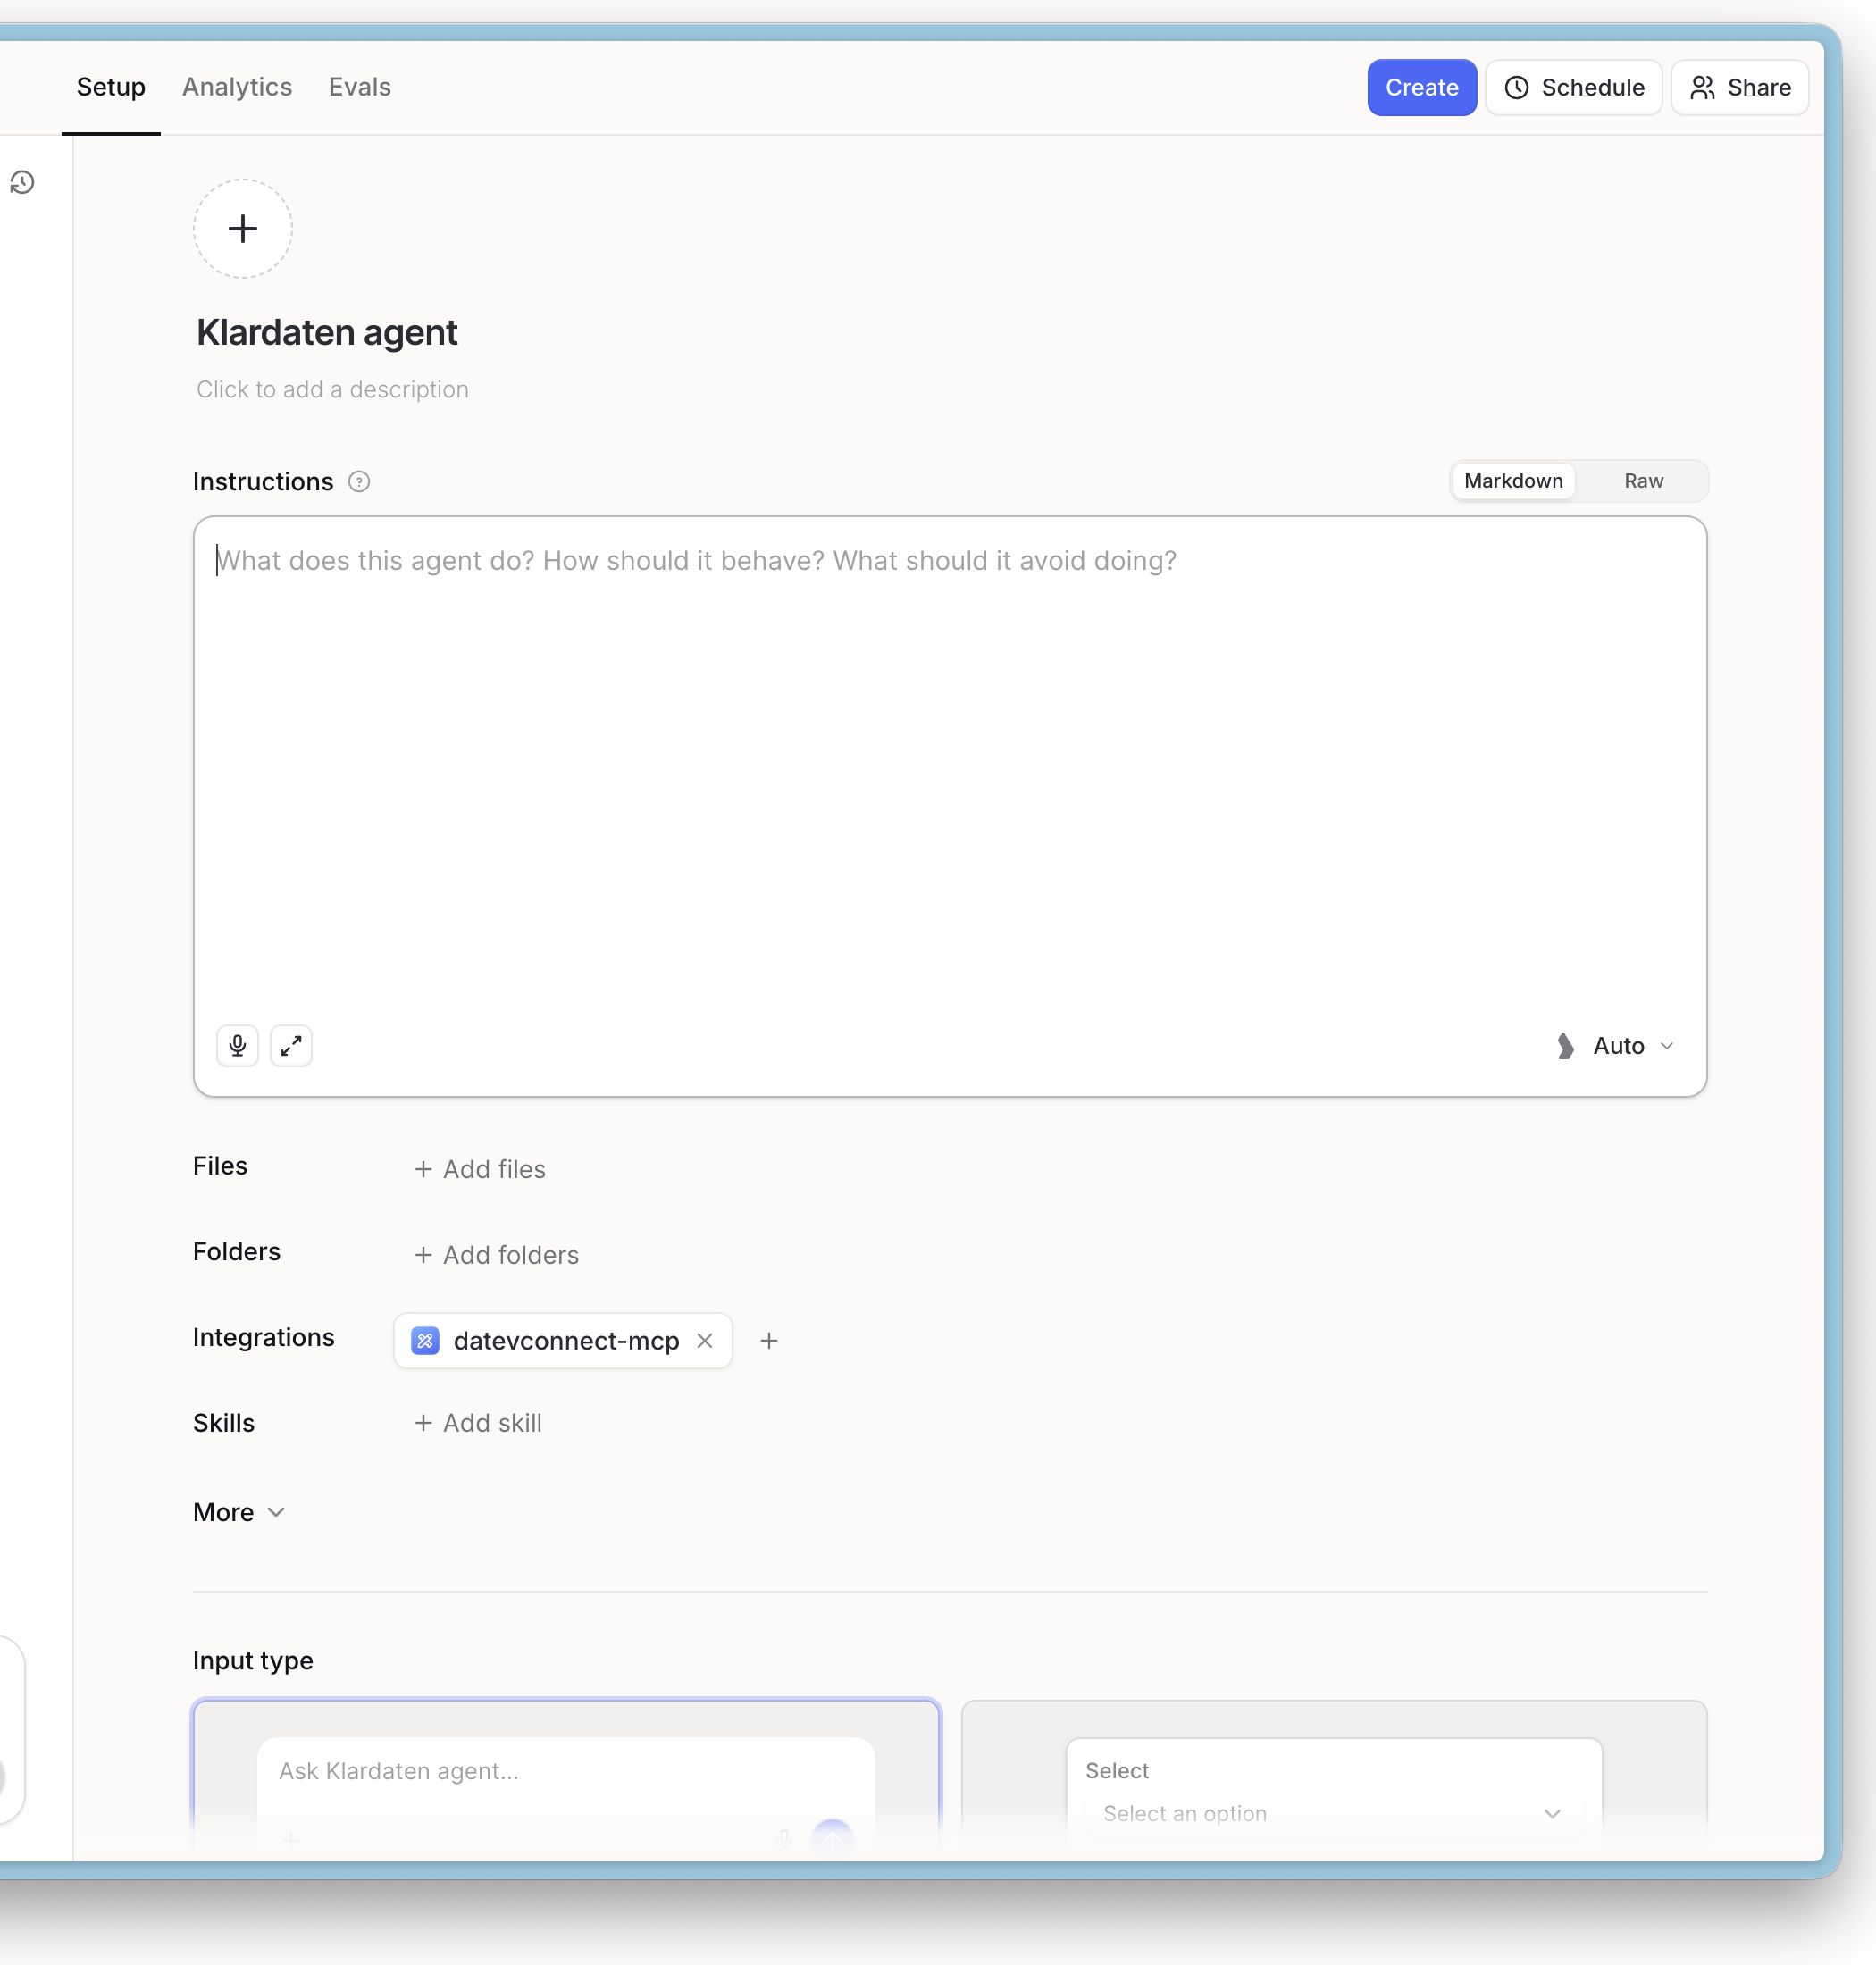
- Open the added datevconnect-mcp integration in the Agent editor.
- Enable all Klardaten tools and select the connection owner's OAuth Client connection for every tool. The green check mark shows that the connection is available.
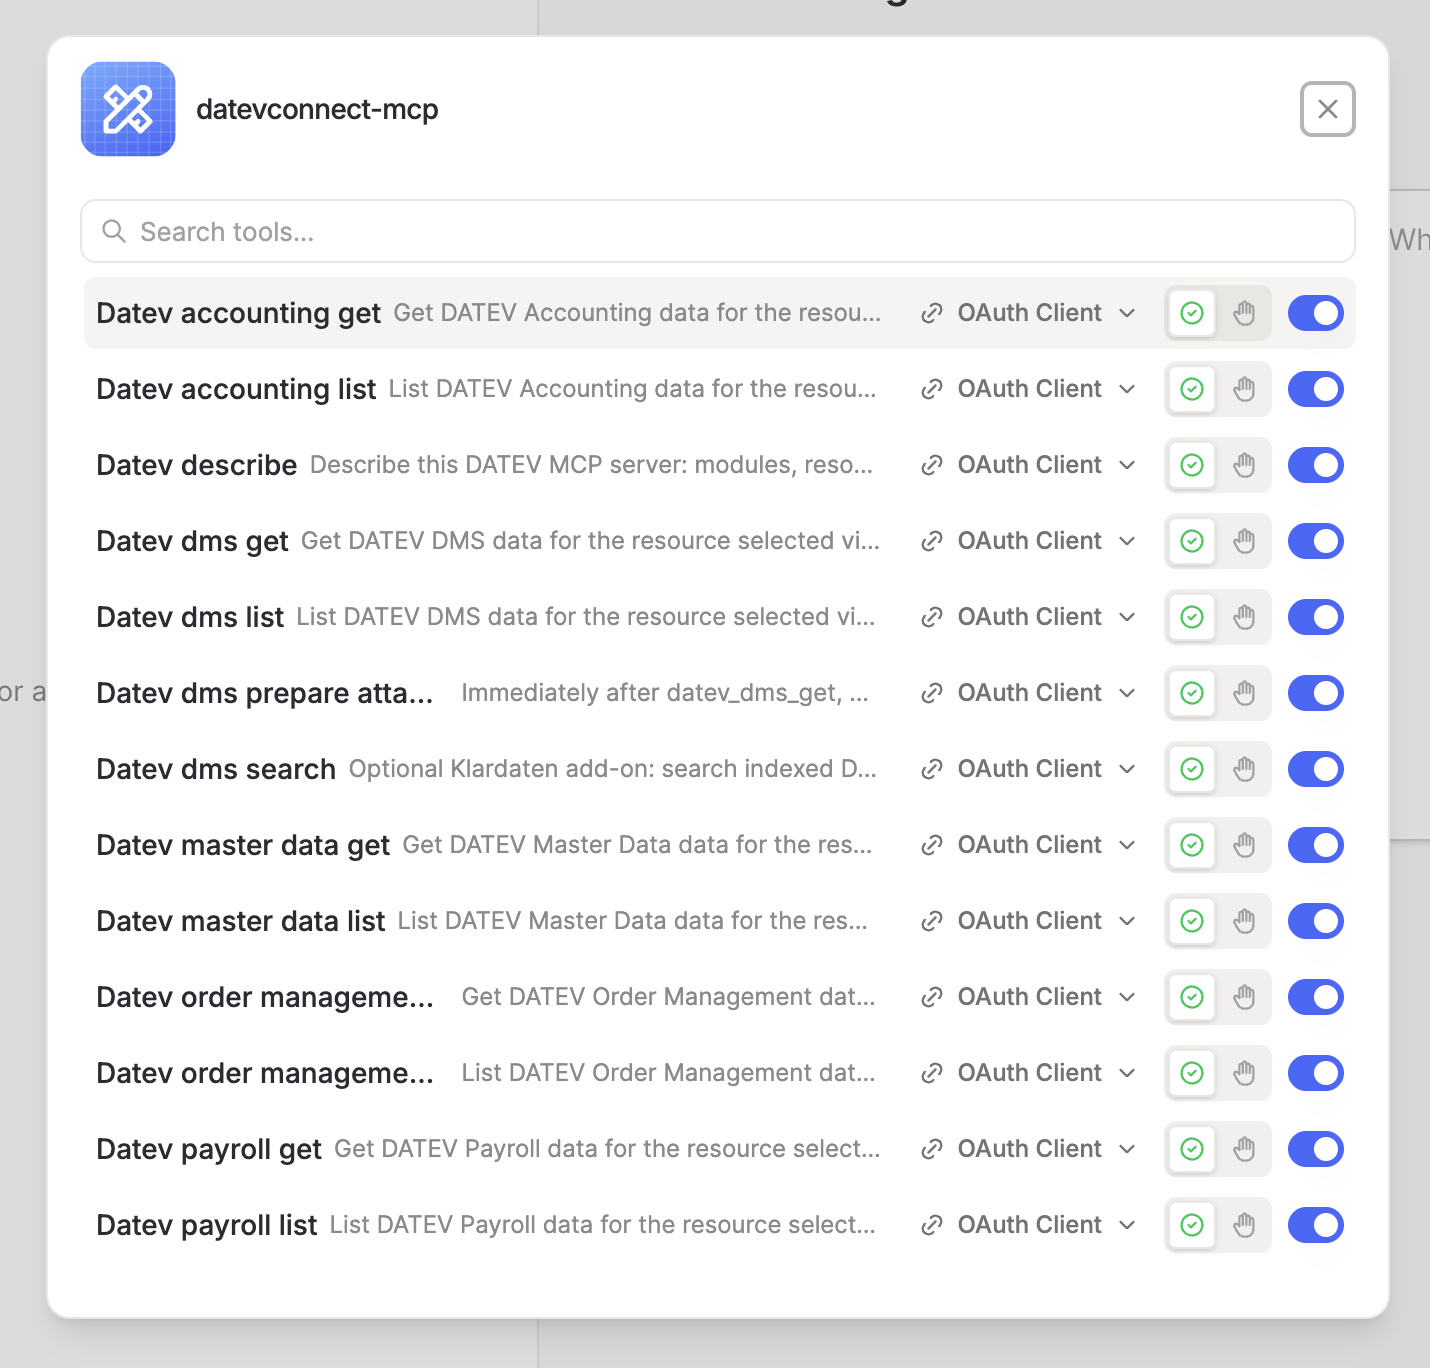
- Click Create to publish the initial Agent.
- Click Share, add the employees or groups who should use the Agent, and confirm the share settings.
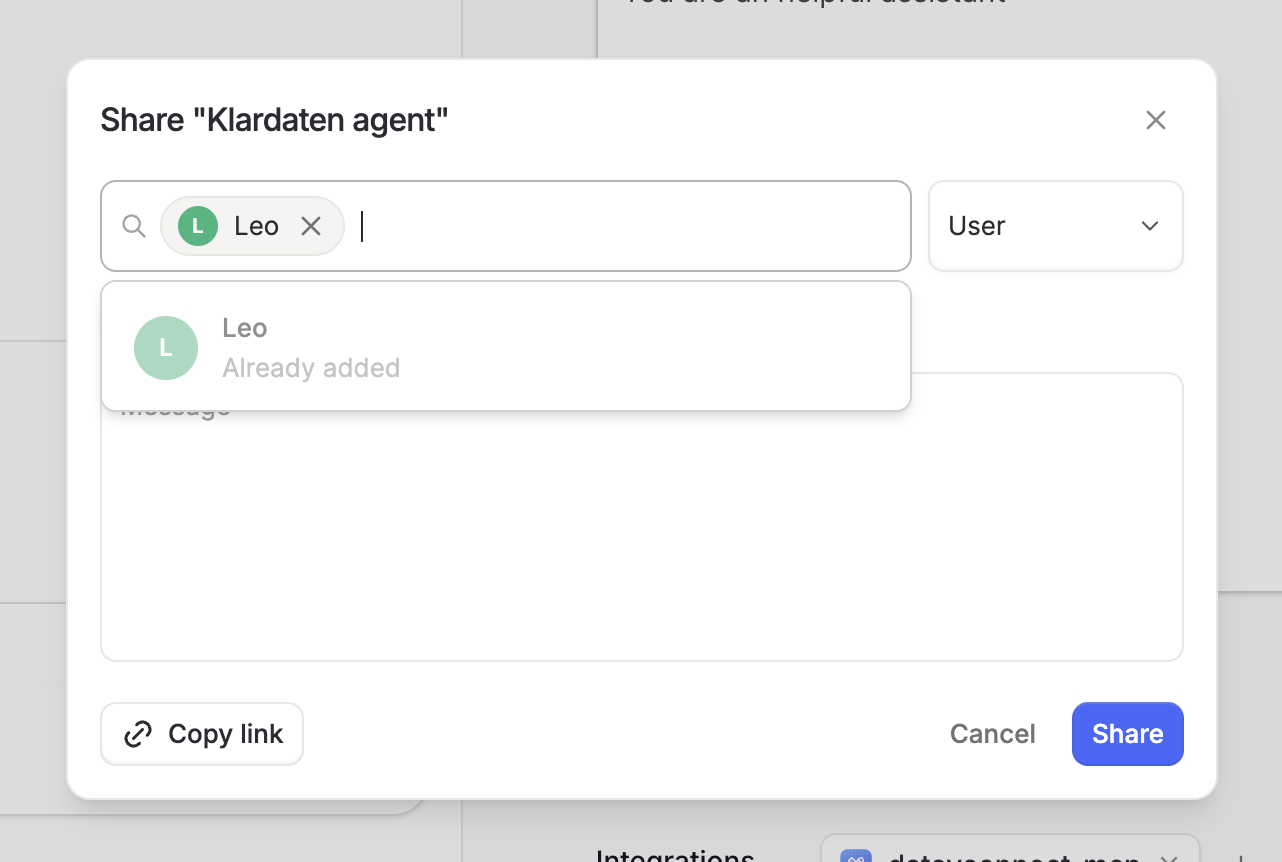
Important: update the published Agent
Langdock uses the active published version of the Agent at runtime. After preselecting the connection and sharing the Agent, make a small, meaningful change to its instructions or description. When Langdock shows a pending change and the Update button, click Update. Integration changes alone may not make this button appear.
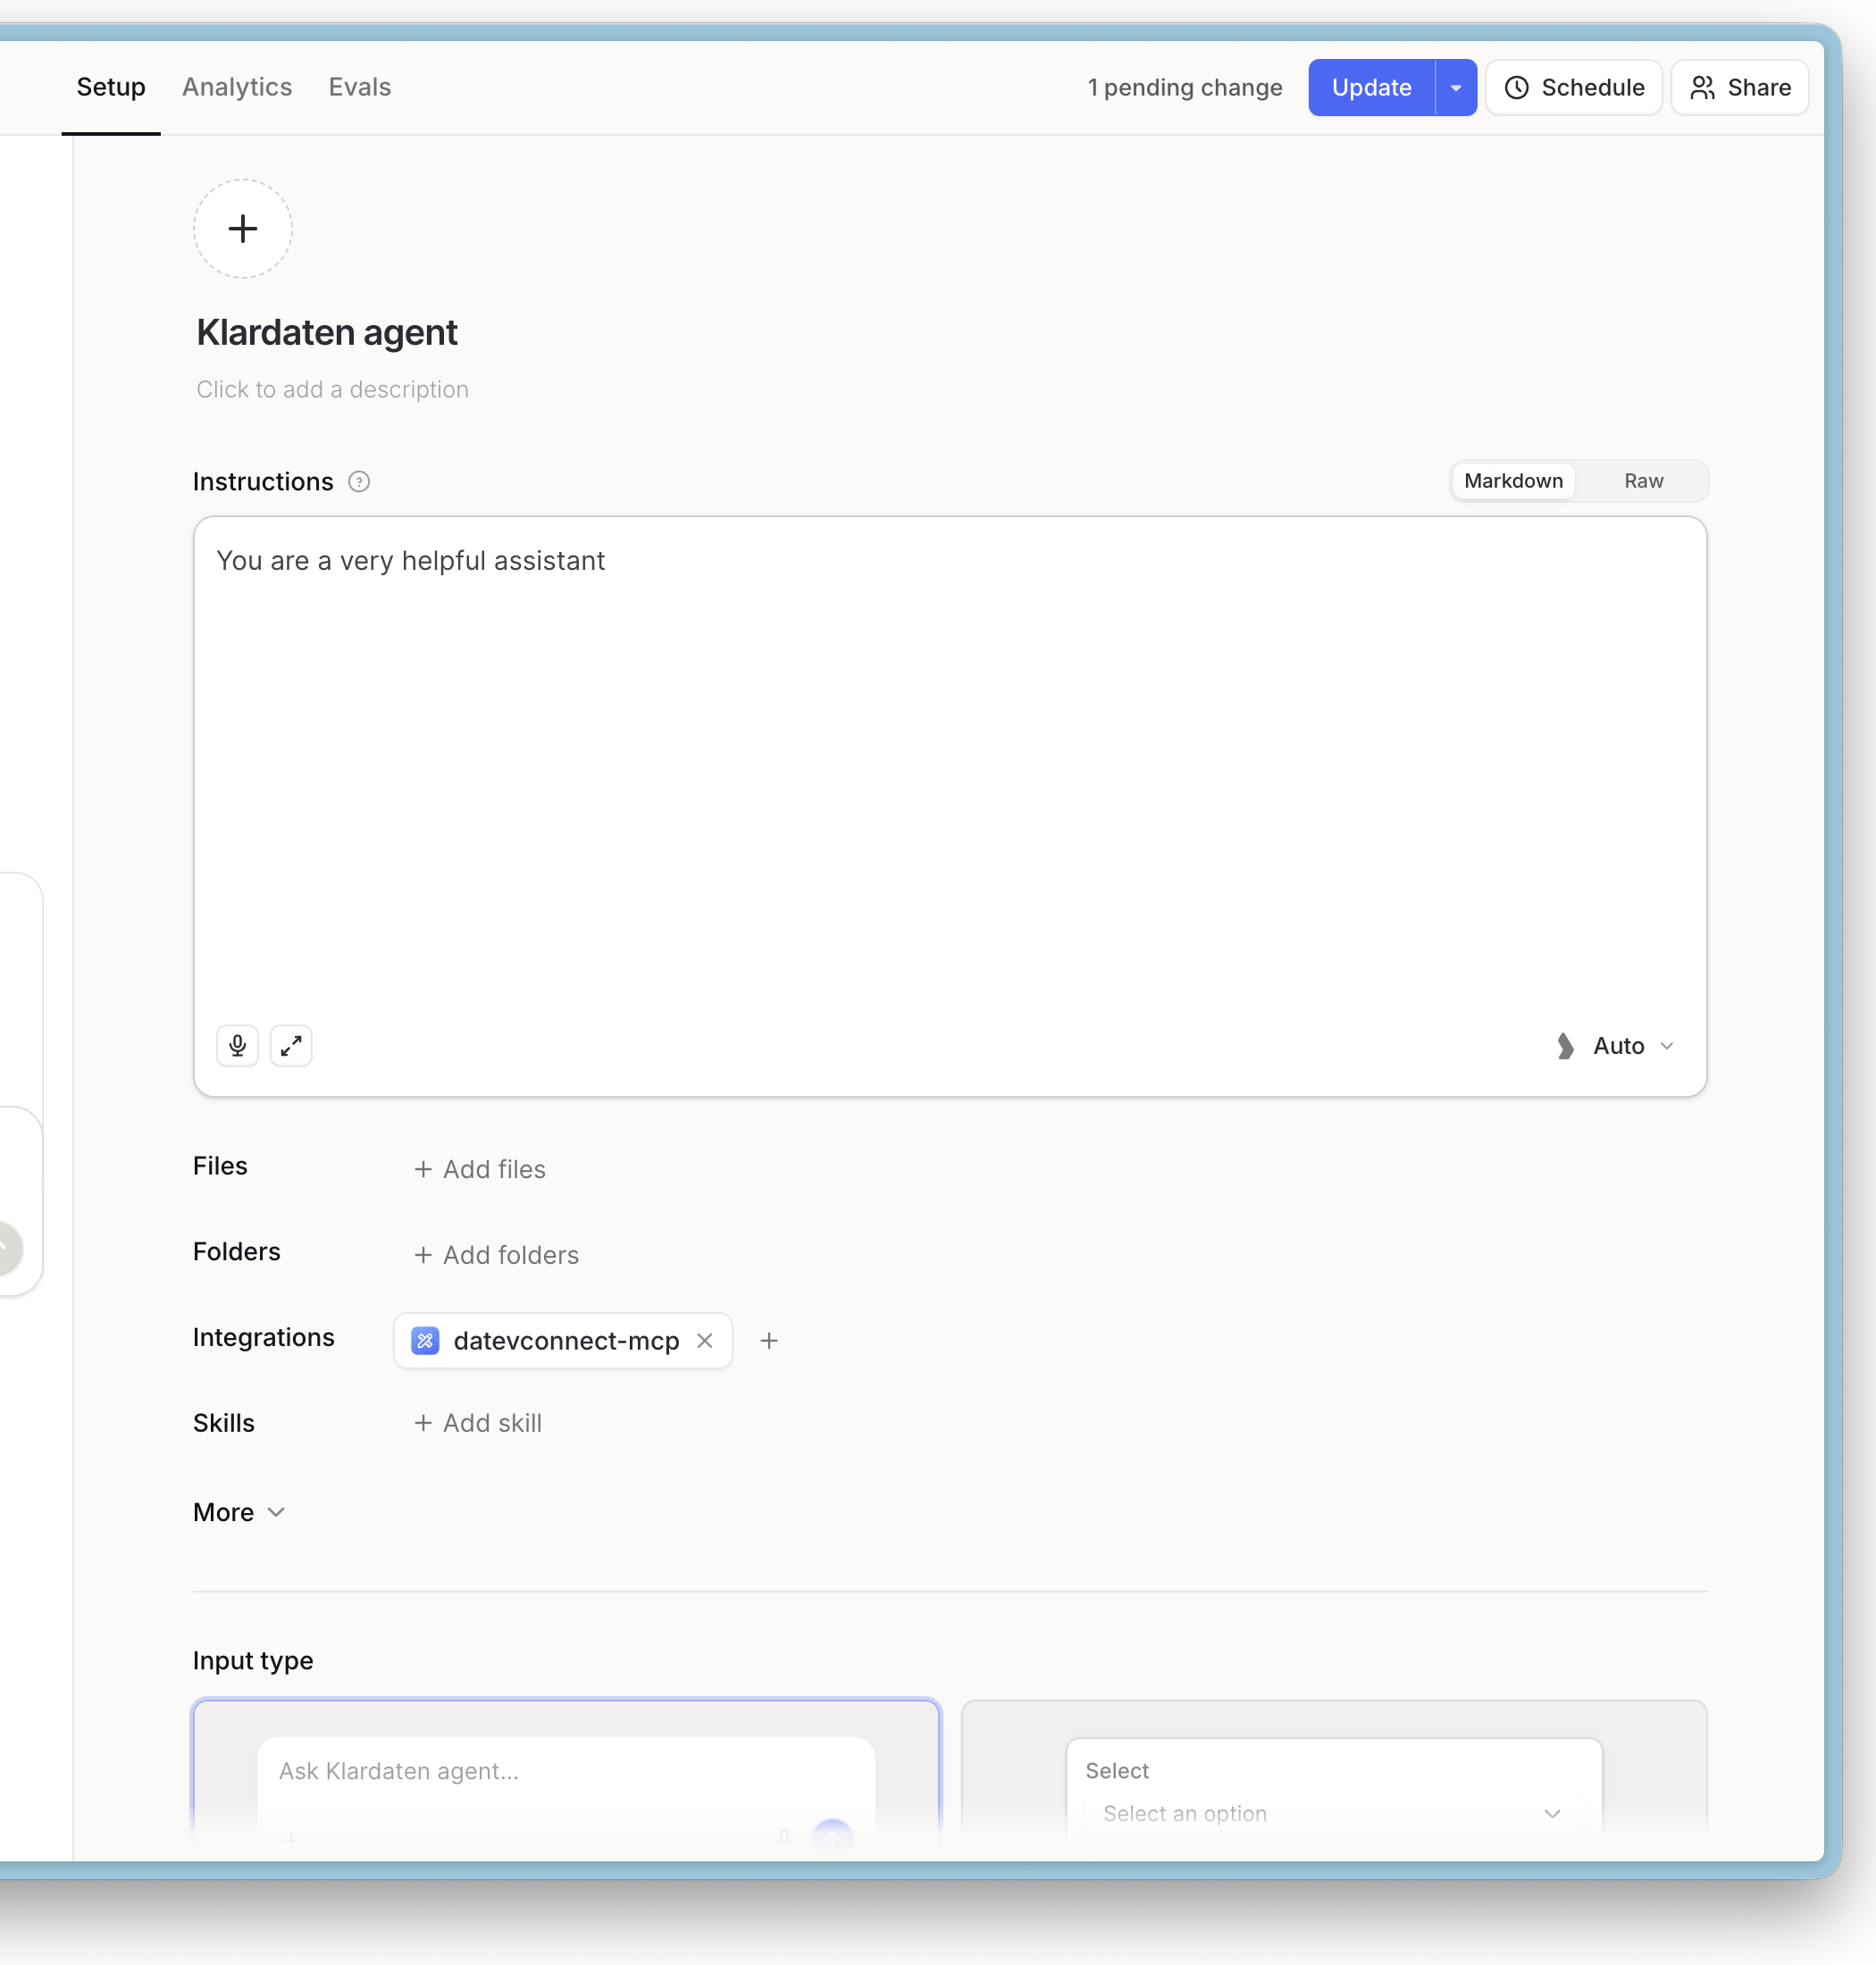
If a member sees "Please add a connection to proceed"
This normally means that the published Agent does not contain a valid preselected connection yet.
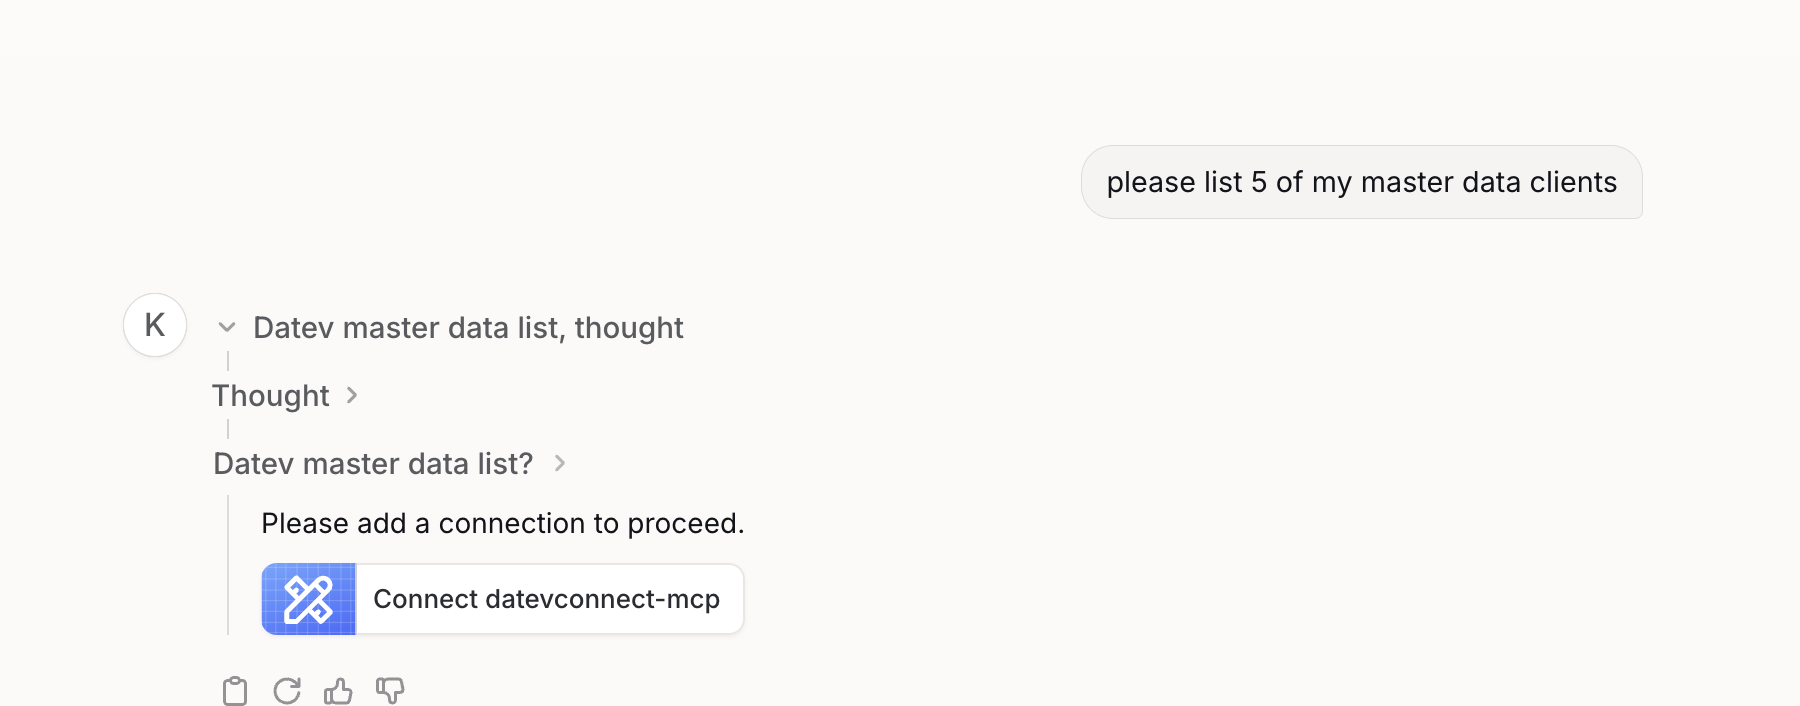
- Do not create a connection in the employee account unless that employee should use a separate personal authorization.
- Have the connection owner reopen and reauthorize the Klardaten connection.
- In the Agent editor, confirm that every enabled tool still shows the owner's OAuth Client connection.
- Make another small change to the Agent instructions or description, then click Update.
- Have the employee start a new chat with the shared Agent instead of continuing the previous chat.
Verify the shared Agent
In a new Agent chat, the employee should now be able to use the Klardaten tools without authenticating. The connection remains available only through the Agent actions.